Do I Really Need Gutters and Downspouts on My Home?

Although gutters and downspouts are a seemingly simple system, they have a pretty important job in protecting your home.

 Gutters and downspouts are on your home for a reason. Their job is to manage the water that runs off of your home’s roof. Proper attention and maintenance will go a long way toward protecting the structural integrity of your home’s foundation, not to mention keeping your basement dry.

 Gutter system clogged with leaves

How much water can flow off of a roof?

Have you ever watched the water run off the edge of your roof? It may not look like much when spread over the perimeter of your home. One of the “factoids” our home inspectors share with our clients is that 1 inch of rain on 1,000 square feet of surface area is nearly 625 gallons of water. Let’s just say you have 1,500 square feet of roof and we have a 2-inch rainfall; that’s a whopping 1,875 gallons of water dumping next to your foundation!

 Without gutters, the water running off of your roof pounds directly onto and erodes the soil next to your foundation. Dumping all of that water next to your foundation increases the risk of a wet or damp basement. In addition, saturated soils will expand more as the ground freezes in the winter, which can cause heaving or displacement of your foundation.

 The gutters and downspouts on your home are there to safely manage and control the runoff away from your home. Proper water management protects your home and yard by controlling the flow of water and preventing pooling and erosion next to your foundation.

 Clogged gutters full of water

 Gutters and downspouts need periodic maintenance.

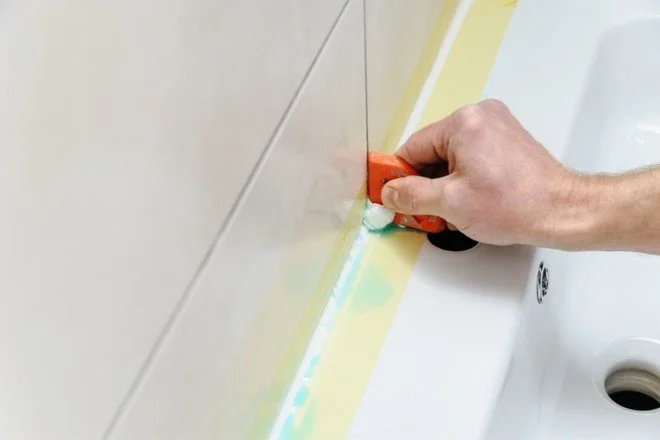
Like most home systems, your gutters and downspouts need periodic maintenance. Clogged gutters and downspouts are as bad as not having them in the first place. Our home inspectors frequently call out maintenance issues with the gutters and downspouts. We see gutters full of leaves and sticks, which clog the system and allow water to flow over the edge. Water also weighs about 8 pounds per gallon, so if your gutters are full of water, you risk damage to your system due to the weight. It’s also important that the discharge chutes at the bottom of your downspouts are directing the water away from your foundation. Our home inspectors frequently find discharge chutes that are crushed or disconnected.

 Water pooling next to the foundation due to a missing discharge section

 Your gutters and downspouts should be cleaned at least twice a year. The best times are in the spring and then in the fall, after the trees have shed their leaves. Gutters that are full of debris in the winter can result in ice buildup and ice dams forming at the edge of your roof.

 Clogged and frozen gutters detached from the edge of the roof

 If you have the skills and can do it safely, you can maintain your gutters and downspouts yourself. You can also hire a professional gutter cleaning company to do it. The third option is to have a system installed that will prevent debris from entering and clogging your gutters and downspouts. These can either be installed on an existing system or purchased as a complete system. Click here to see a comparison of gutter guard systems.

 Summary

Your gutters and downspouts are an important part of your home. Keeping them maintained and properly functioning will manage water and protect your foundation and landscaping.

 When performing a home inspection, one of the items we look at are the gutters and downspouts on the home. Taking note of the condition of the gutter and downspout system will give your home inspector clues as to water management and whether or not there may be issues with moisture in the basement.

 At HomePro Inspections, our home inspectors are trained to inspect all areas of the home. Having properly installed and maintained gutters and downspouts will help to protect your home from excessive water at your foundation. Any issues found are documented in your home inspection report and recommended for resolution by a qualified professional.

 Visit our website to learn more or to schedule your home inspection in the Rochester, Owatonna, and Faribault, MN areas. You can contact us today at (507) 202-8942 or utilize our online “Schedule Now” feature to set up an appointment.

Cleaning Your Refrigerator Condenser Coils in 5 Easy Steps

Your refrigerator is one of the hardest-working and most expensive appliances in your kitchen, so it’s only natural that you’d want it to run at peak performance and last as long as possible. Keeping your refrigerator condenser coils clean is a great way to meet both of these goals, and this simple task only takes about 10 to 15 minutes.

 Dirty refrigerator condenser coils at the base of a refrigerator

 The condenser coils are typically located on the back of or underneath a refrigerator. These coils are exposed to allow for air flow and heat dissipation. Over time, these coils can become clogged with dust and debris. Dirty refrigerator coils make your refrigerator work harder to stay cold, resulting in higher electric costs and reducing its lifespan.

Dirty refrigerator condenser coils on the back of a refrigerator

The good news is that cleaning your refrigerator’s condenser coils is a relatively simple DIY project. Your refrigerator coils should be cleaned at least once a year, or every six months if you have any furry pets in the home.

 Tools needed:

·         Flashlight

·         Dust mask

·         Condenser coil brush

·         Vacuum cleaner

 5 easy steps:

 1.    Unplug the power cord from the electrical outlet. Depending on the location of the outlet, you may have to pull your refrigerator away from the wall. Keep your refrigerator doors closed to help keep its contents cold.

 2.    Locate the condenser coils. They are generally located either on the back side or under your refrigerator. If they are under, you will have to remove the toe grill.

 3.    Put on your dust mask to prevent inhaling any airborne dust you may stir up. Using your flashlight, inspect the condenser coils. Vacuum as much as you can with a narrow vacuum attachment.

 4.    Using a coil brush, work through the coils to loosen debris and dust. Hold the vacuum attachment close to the brush to keep dust to a minimum. The brush should be able to get to most of the coils. These brushes are usually bendable, and you may need to bend the tip to get at any hard-to-reach places.

 5.    Take a minute to inspect your work and vacuum up any lingering dust bunnies. Wipe down the toe grill and snap it back in place. Plug your refrigerator back into the wall outlet and roll it back in place.

Dirty toe grill at the front of the refrigerator

Keeping your refrigerator running at peak performance is as simple as performing a 15-minute cleaning once or twice a year. When you finish, grab a cold beverage for a job well done. Your refrigerator will use less energy and last longer. Pretty cool, huh? (See how I did that?)

 Summary

At HomePro Inspections, our home inspectors are trained to look for and report any potential issues they may come across. Any issues are documented in your home inspection report and recommended for resolution by a qualified professional.

Visit our website to learn more or to schedule your home inspection in the Rochester, Owatonna, and Faribault, MN areas. You can contact us today at (507) 202-8942 or utilize our online “Schedule Now” feature to set up an appointment.

Cleaning Your Air Conditioner Condensate Drain with Vinegar

One of the top reasons homeowners call for service on their air conditioning system is because of a clogged and overflowing condensate drain line. Most people don’t know that you can avoid this issue with some regular DIY maintenance on your air conditioner system. Usually, you can remove the clog and avoid overflows yourself. Below are some steps to help keep your air conditioner’s condensate line clear and avoid overflows.

 Air conditioner evaporator coil and condensate tray.

The blue plug is where the condensate drain is attached.

 What is a condensate drain line?

First, a little background is needed to help you better understand what an air conditioner condensate drain is. Inside the air handler, there is an evaporator coil that air passes through when your air conditioner is running. As the air passes through the coil, moisture will condense on the coils and drip into a tray. The condensate drain on this tray allows the water to run into the condensate drain line, which then, by gravity, channels the water, usually to a floor drain.

 Condensate drain line with capped access point.

 How do I know if my air conditioning condensate drain line is clogged?

The condensate tray and condensate drain line are both damp places when the AC is running. Water, when combined with dust and lint, can result in a sludge that builds up throughout the drain line over time. This sludge provides a great place for mold, mildew, algae, fungus, and bacteria to grow. Once there is a buildup, you have the potential for a blockage that will cause the water to back up and overflow the condensate tray. One indication that the condensate drain line is clogged is if you see water pooling around the bottom of the furnace.

 How do I prevent the condensate drain line from clogging?

Regular, routine cleaning can help keep the air conditioner drain line from clogging. By repeating the steps listed below, you can kill any mold, mildew, algae, moss, and bacteria.

 Our home inspectors will gladly discuss the air conditioning system with you if you are present during your home inspection. We will show you the condensate drain line and talk about maintenance and cleaning. Just like changing furnace filters and such, you should make cleaning your air conditioning drain line a part of your monthly maintenance schedule. Unfortunately, as is often the case, out of sight, out of mind.

 Adding distilled white vinegar or water to the condensate drain line using a funnel.

 Note: The white cylinder with the black wires in the picture above is an audible overflow alarm sensor at the condensate tray.

 Step-by-step guide

·        Turn your air conditioner off - Switch your thermostat and circuit breaker to the off position.

·        Locate your air conditioner drain line - The condensate drain line is usually a PVC pipe running vertically down the side of your furnace and over to a floor drain.

·        Find your drain access point - Most condensate drain lines have an opening at the top. If your condensate drain line has a cap, remove it. Check to see if there are any blockages.

·        Flush with distilled white vinegar – Pour 1/2 cup of distilled white vinegar down the condensate drain line at the access point. Distilled white vinegar increases acidity and aids in cleaning.

·        Wait 30 minutes, then flush with hot tap water – Flush the condensate drain line with a quart of hot tap water to ensure that everything drains and flows freely.

·        Repeat once a month – By avoiding clogs and buildup, your condensate drain line will work properly.

·        Turn your air conditioner on - Switch your thermostat and circuit breaker to the on position.

 Summary

Taking some time for preventative maintenance on your home and air conditioning system will keep it running and performing to meet your needs. Service calls to unclog an air conditioner condensate drain line are costly and avoidable. Potential damage from water overflowing into your home because of a clog can be eliminated by taking a few steps every month.

 At HomePro Inspections, our home inspectors are trained to inspect your HVAC system and its components. Any issues are documented in your home inspection report and recommended for resolution by a qualified professional.

 Visit our website to learn more or to schedule your home inspection in the Rochester, Owatonna, and Faribault, MN areas. You can contact us today at (507) 202-8942 or utilize our online “Schedule Now” feature to set up an appointment.

Roofing Red Flags Found During Home Inspections

One of the most important considerations when purchasing a new home is the condition of the roof. The roof is a major part of the exterior envelope that protects your home from the weather and outdoor environment.

 A home inspector observing the roof from the eaves

 When performing a home inspection, our home inspectors do their best to assess the condition of the roof. Our home inspection Standards of Practice (SOP) states that the home inspector shall inspect from the ground or eaves. That’s right: ground or eaves. We are not required to walk the roof. Your home inspector may decide to walk the roof, but only if it is safe to do so. We want to have the best look at the roof, but sometimes ice, rain, snow, high winds, height, and roof pitch keep us off the roof.

 The cost of a roof replacement can be high, but the investment in a solid roof is well worth protecting your home. Roof leaks or a roof that is at or beyond its serviceable life may have leaks that can lead to water damage such as rot and mold.

 The following is a general list of red flags that your home inspector will look for when performing a roof inspection. Any issues will be documented in your home inspection report.

 Record of roof replacement

If there is a copy of the property disclosures available, your home inspector will review the document to see if there is a date listed when the roof was replaced. If not, we make our best attempt to determine an approximate age. Roofs over 20 years old should be monitored closely and replaced if they are nearing the end of their life span.

 Excessive moss and tree branches

On areas of your roof where the “sun doesn’t shine,” there is potential for moss growth. Moss can damage your roof and result in failure if it undermines the surface. Excessive moss should be professionally removed or treated to keep it from damaging your roof.

 Moss on a roofing surface

Tree branches should never come into contact with your roof surface. The wind will cause the branches to rub on the roof and wear away the granules on the shingles, causing premature failure of the roof surface.

 Missing or curling shingles

As shingles age, they can start to become brittle. The aggregate surface starts to deteriorate, and the substrate of the shingles is more exposed to sunlight. This can cause the edges to curl up, making your roof susceptible to wind damage. High winds can either snap off a shingle tab or whole sections of your roof.

 An extreme case of curled and patched shingles

 Previous roof repairs

If your home inspector sees prior patching or shingles that are replaced on a roof, this could mean that there were issues with installation, high winds, or aging of the roof surface.

 Moisture damage in the attic

A leak in a roofing system may lead to rot and deterioration to the structure or framing of your roofing system as well as the roof decking. These types of leaks may never get bad enough to present themselves on the ceiling, but they can lead to some major damage if undetected.

 Dark spots or paint patching

Moisture stains and areas on the ceiling that look like they’ve been painted over can be signs of past or present leaking. These types of leaks can indicate potential problems with water damage or mold in the materials on the other side of that paint.

 Summary

A solid roof is important to protect your home from the elements. Whether part of a home inspection or not, homeowners should take the time to look at their roofs at least seasonally. If any of these red flags present themselves, resolve them immediately.

 At HomePro Inspections, our home inspectors are trained to inspect the roofing system of your home. Any issues are documented in your home inspection report and recommended for resolution by a qualified professional.

 Visit our website to learn more or to schedule your home inspection in the Rochester, Owatonna, and Faribault, MN areas. You can contact us today at (507) 202-8942 or utilize our online “Schedule Now” feature to set up an appointment.

Reducing Smells (Odors?) in Your Washing Machine

We all love it—that warm, fresh smell of laundry right out of the washing machine. We think that because our washing machines are for cleaning, they should be clean, right?

 Just like most appliances and machines around your home, your washing machine needs to be inspected and maintained regularly. If your washing machine is not properly maintained and cared for, it can result in some bad odors, and nobody wants that. There are a variety of reasons why your washing machine may become a bit smelly, and to keep those foul odors under control, there are some steps you can take to keep it well-maintained and odor-free.

 Does your washing machine smell?

Keep your drum, seals, and door clean

Lint builds up, and a dirty drum can play a big part in why your washing machine has that funky smell. Even though it is a “washing machine,” it can still accumulate laundry soap residue, dirt, and lint. Over time, moisture, along with built-up residues, can lead to mildew, mold, and a musty smell if your washing machine isn’t properly maintained and kept clean.

 Cleaning the inside surfaces of the drum, seals, and door regularly with vinegar or an all-purpose cleaner is recommended. Vinegar is an all-natural cleaner that is inexpensive, does a great job of eliminating odors, and won’t damage any of your washing machine’s internal components.

 Built-up lint can also lead to odors in your washing machine, so make sure to clean out the lint filters after every load. If you make this a habit, you can reduce odors and eliminate another source of potential smells.

 Although using bleach in white loads can help to kill bacteria, eliminate mildew, and remove some mold strains, it usually only affects the internal drum and not the seals or other areas such as the seals in the door.

Cleaning the washing machine seal

 Remove wet clothing

Leaving wet clothes to sit after the wash cycle or throwing wet towels and such in the washing machine to be washed later can also create an environment for mold and mildew to grow. Mold likes dark, moist environments. Leaving clothes in the washing machine can provide an ideal environment for mold to grow and spread.

 Don’t overload your washing machine

You naturally want to get the most out of every load of laundry. Overloading your washing machine makes it difficult for water and detergent to circulate efficiently. Just because the drum has extra room doesn’t mean you should fill it.

 Refer to your owner’s manual to determine the proper load size for your washing machine. By properly loading your washing machine, everything will be cleaned and rinsed of any soap residue and dirt. By being a bit more moderate with your loads, you can reduce buildup and keep bad odors at bay.

 Residue and water build up at a door seal

 Cleaning products

Determining the correct amount of soap or other cleaning products will vary with the material, color, size, and weight of every load. Too much soap can result in residue buildup in your washing machine. Not enough soap, and your clothes may not feel and smell clean. Read your cleaning product labels for recommended amounts based on load size.

 Summary

Sticking to a regular schedule for cleaning and maintenance will help get rid of the sources of bad odors. Taking care of the machine that takes care of your clothing will be well worth it in the long run.

 At HomePro Inspections, our home inspectors are trained to inspect all areas of the home. Although inspection of washing machines is outside the scope of a home inspection, our home inspectors will note any bad smells during the course of your home inspection. Any issues found are documented in your home inspection report and recommended for resolution by a qualified professional.

 Visit our website to learn more or to schedule your home inspection in the Rochester, Owatonna, and Faribault, MN areas. You can contact us today at (507) 202-8942 or utilize our online “Schedule Now” feature to set up an appointment.

Don’t Ignore Water Leaks in Your Home

It’s pretty typical for a homeowner, even a home inspector, to let procrastination take over sometimes. Even something small like a water leak can go on for a while before it gets fixed.

 Water leaks are one of those things that seem like they are not such a big deal but can add up to some unexpected costs if they are not resolved in a timely manner. These things typically don’t heal themselves, so you just have to fix them before they end up costing you money.

Water leaking from a faucet

 Potential areas for leaks

Think of all the places in your home where water leaks can happen. Kitchen, laundry room, bathrooms, and appliances like water heaters, water softeners, and refrigerators that dispense water and ice cubes. All of these areas and appliances have the potential for water leaks. You should make it a practice to occasionally inspect these for leaks or wetness.

 There are a wide variety of reasons for water leaks. Sinks and laundry tubs can develop a broken seal at the drain. Pipe joints can crack or deteriorate due to movement. Clogged or deteriorated drain lines may have leaks in concealed areas. High water pressure may result in leaks in your water lines or fixtures. Regardless of the reason, water leaks should be resolved as soon as they are noticed.

 Periodically check for leaks

Many times, homeowners don’t even know they have a problem until they see the damage caused by a water leak. Years ago, I walked across the family room in the basement and realized that the carpet was wet. After some investigation, I found a small pinhole in the shower faucet within a wall. Luckily, the damage was confined to some wet sheetrock and carpet.

 We advise our home inspection clients to pay attention to and perform routine checks around toilets, showers, faucets, garden hoses, water softeners, and water heaters. Anywhere there is a potential for drips, slow leaks, or hidden leaks should be checked periodically.

 The costs of a water leak

 In areas where there’s a drip at a faucet or a toilet that has a water leak at the tank seal, the cost of wasted water can add up over time.

 It is estimated that nearly 1 trillion gallons of water are wasted every year due to leaks. Your water bill could increase by up to $20 per month because of a dripping faucet. A leaky toilet can add up to another $150 per month. If neglected, these two simple fixes could potentially cost you up to $2,000 a year in wasted water usage.

 These types of leaks are usually relatively easy to fix. A leaking faucet may just need a seal replaced or tightened, and a toilet water leak can most likely be resolved by replacing the flapper valve in the toilet water tank. Fixing leaks like these yourself can save you a lot of money. If you aren’t comfortable doing it yourself, hire a plumber. It will cost more to fix the leak, but over the long haul, it will save you money.

 Potential water leak at the flapper valve

 Organic growth and deterioration

Again, ignoring a water leak can cause major damage to your home, and quite often, that damage is hidden. Even if it seems small or unimportant, over time, a small or recurring leak can cause significant damage.

 Mold can grow in conditions where something is continually wet. These areas can be hidden in walls, under sinks, or in other concealed places. If you detect a musty or moldy scent in your home, don’t ignore it. Molds can cause health issues for some people.

 Deteriorated wood from a water leak

 Mold and wetness can also deteriorate building materials. Our home inspectors often find rotted wood under toilets and bathtubs in older homes. These can be areas that are hard to get to, so they can go unnoticed for years. Water leaks and puddles can also attract insects and rodents, as they provide a water source for them.

 Summary

 Initially, a slow water leak or drip may not seem like much, but over time, it can result in a big expense. Whether it’s increased water usage or damage, it comes right out of your pocket. Take the time to do a periodic inspection of your home to check for any potential water leaks.

 At HomePro Inspections, our home inspectors are trained to inspect all areas of the home. We look for water leaks and potential damage during the course of your home inspection. Any issues found are documented in your home inspection report and recommended for resolution by a qualified professional.

 Visit our website to learn more or to schedule your home inspection in the Rochester, Owatonna, and Faribault, MN areas. You can contact us today at (507) 202-8942 or utilize our online “Schedule Now” feature to set up an appointment.

Should I Attend My Home Inspection?

When scheduling a home inspection, our client care representatives are frequently asked, “Should I attend my home inspection?”

 At HomePro Inspections, our answer is always “yes!” We always recommend to our clients and realtors that they attend their home inspection. We want our clients to engage with their home inspector, see what the inspector is inspecting, and learn about the condition of their new home.

 Your biggest investment

Buying a new home is a big investment, and for most people, it is likely the largest investment they’ll make in their lives. Regardless of the market, you should always insist on a home inspection, and you should attend the home inspection. It is essential that you know the condition of the home you are investing in.

 The inspection process

The inspectors at HomePro Inspections are certified through the International Association of Certified Home Inspectors® (InterNACHI) and strictly follow their stringent Standards of Practice (SOP). During the home inspection, our home inspectors follow a comprehensive process to check and address all systems and parts of your home, from the foundation to the roof.

 Their job is to provide you with an unbiased opinion of the general condition of your new home. This opinion includes both the good points and any problems that need to be fixed.

Findings of the Home Inspection

 As the home inspector works through your home inspection, they will explain what they are doing and discuss any defects or positive attributes of your new home. This is an opportunity to get firsthand answers to any questions you may have.

 If you cannot be there for the full home inspection, your home inspector will perform a summary walk-through with you, pointing out the highlights and concerns of their findings at the end of the home inspection. If you cannot attend at all, you can request a follow-up call with your home inspector after you have reviewed your report.

 Our findings are documented on our handheld devices throughout the course of the inspection. This allows your home inspector to complete the final report efficiently and get it to you via email, typically within a few hours after the completion of your home inspection. We want you to have the report as soon as possible, while the home inspection is still fresh in your mind.

 Firsthand is always best

Being present for your home inspection allows you to see firsthand any concerns your home inspector may discover. All concerns are documented, and pictures are provided in your home inspection report. Being there for the inspection allows you to interact with your home inspector as well as ask questions to help you better understand your new home.

 We understand that buying a new home is exciting, and clients may want to bring both sets of parents, contractor friends, children, or a trusted family member to the home inspection. We recommend, however, that only the primary homebuyers attend the home inspection. This lets you and the home inspector look at the results and talk about them in a focused way.

 Experience has shown us that the more people there are at a home inspection, the greater the risk of distractions and interruptions. The home inspection process requires the full attention of the home inspector, and the buyer needs to make every effort to understand what the inspector is trying to communicate to them regarding the condition of their new home.

 Learning how to operate your new home

As you proceed through the home inspection, your home inspector will share maintenance guidance with you. In addition, we show you where all of your main shutoffs are. We also tag these valves with their appropriate names to help you find them in the case of an emergency. It is important to know how to shut off water and gas valves as well as where the main electrical disconnect is located in the event of an emergency. Your home inspector will show you where your furnace filter is located, as well as thermostats, garage door controls, and any other unique aspects of your home. Of course, any questions you may have can be answered as you work through the inspection process.

 Summary

Buying a new home can be a stressful yet exciting experience for most people, especially first-time home buyers. Knowing the condition of your new home will help relieve that stress and give you peace of mind. You will have the information you need to know whether you made a wise decision in the purchase of your new home.

 At HomePro Inspections, our home inspectors are trained to inspect and share the information found during your home inspection. Any issues they find are documented in your home inspection report and recommended for resolution by a qualified professional.

 Visit our website to learn more or to schedule your home inspection in the Rochester, Owatonna, and Faribault, MN areas. You can contact us today at (507) 202-8942 or utilize our online “Schedule Now” feature to set up an appointment.


Smoke Alarms – Evolving to Meet Modern Needs

We see this a lot during home inspections: smoke alarms that are removed, disconnected, or disabled in some way. Whether it’s due to that annoying low battery chirping noise, the shrieking “false alarm” caused by the smoke from a burnt pizza, or because the smoke alarm is old, people disable their smoke alarms and then forget about them. That’s a dangerous thing to do. First, even though smoke alarms can be an occasional nuisance, by code, they’re required. Second, the lack of properly functioning smoke alarms is an invitation to potential disaster, putting you and your family at lethal risk in the event of a fire or smoke-related incident.

This fact speaks for itself: in a home where the smoke detectors are broken or not working, your chance of surviving a smoke-related accident is 55% lower than in a home with working smoke alarms installed in the right places.

Research and development continue in the ongoing task of designing smoke alarms that can distinguish between the smoke caused by a cooking source and an actual fire. Underwriters Laboratories (UL), the folks that set consumer safety standards, has recognized these smoke alarm issues. They don’t want to see people disabling their smoke alarms and have been working towards the goal of developing products that can reduce nuisance alarms.

What is the difference between a smoke alarm and a smoke detector?

As with most products these days, choosing the correct smoke alarm for your home can be confusing. Most consumers can become confused by the various types of smoke alarms and their particular terminology. Below are some basic definitions that can help you choose the best product for your home.

• A smoke detector employs a sensor that can monitor for and detect smoke. These smoke detectors are usually connected to a fire alarm system that protects a whole building through a central control system. Smoke detectors are typically found in commercial applications such as schools and larger commercial buildings.

• A smoke alarm also employs a sensor that can monitor for and detect smoke. In addition, it has a built-in speaker that alerts occupants with an audible alarm when it senses smoke. Smoke alarms are what we typically see in our homes. As usual, there is more than one option for smoke alarms in newer homes, including:

o Single-Station: A single-station smoke alarm is a stand-alone device, either battery-operated or hard-wired into the home’s electrical system. It will sound an alarm if smoke is detected.

o Multiple-Station: A multiple-station smoke alarm employs two or more smoke alarms hard-wired into the home’s electrical system. All alarms in this system will sound if smoke is detected at one of the devices. There are also multiple station systems that are interconnected and communicate wirelessly.

Future standards for smoke alarms

The original standards for smoke alarms were put in place back in the mid-1970s. These standards were periodically updated to better protect people as a result of the newer products and materials being used to build furniture and other things commonly found in homes.

For example, back in the day, most products in your home were made of wood, cotton, wool, and other natural fibers. Today, polyurethane and other synthetic products are used in various forms, such as foam padding and in furniture, flooring, and appliances. These synthetic materials burn faster and hotter than the older materials. The smoke from these polyurethane materials is also different from that created by wood, cotton, wool, and other natural fibers.

The newest standards went into effect during the second half of 2022. Smoke alarms produced under these new standards will have specific labeling stating that they “Help Reduce Cooking Nuisance Alarms.” They must also be able to effectively sense the smoke produced when polyurethane is burning.

Regular smoke alarm maintenance

• Refer to and follow the manufacturer’s maintenance recommendations.

• Check your smoke alarms every month by pressing the test button.

• Replace the batteries per the manufacturer’s recommendations, typically annually.

• Replace your smoke alarms at least every 10 years.

Replacing a battery in a smoke alarm

Note that some of the newer smoke alarms are constructed with a built-in, long-life battery that cannot be replaced. The entire unit must be replaced when it starts to chirp, indicating that it is nearing the end of its useful life. Make sure that if you remove an older smoke alarm, it gets replaced in a timely manner.

Smoke alarm placement

It’s important to have smoke alarms in the proper locations throughout your home. Smoke alarms should be in every bedroom as well as the adjacent area. A minimum of one smoke alarm should be on every level of your home. Check out the Minnesota State Requirements if you have any questions.

Summary

Although the new standards will make us safer in the future, now is a good time to check the smoke alarms currently in your home. Take time every month to test and inspect your smoke alarms. If a smoke alarm is chirping, replace the battery as soon as possible. Upgrading to newer smoke alarms can effectively protect you and your family and reduce nuisance alarms.

At HomePro Inspections, our home inspectors are trained to look for and report any potential issues they may come across. Any issues, such as missing or old smoke alarms, are documented in your home inspection report and recommended for resolution by a qualified professional.

Visit our website to learn more or to schedule your home inspection in the Rochester, Owatonna, and Faribault, MN areas. You can contact us today at (507) 202-8942 or utilize our online Schedule Now feature to set up an appointment.

I Have Black Mold in My House…Now What?

"I have black mold in my house!” We often hear this from people when they call and ask if we do mold testing. The fact is, there are many molds that appear black. Mildew can also look black. Molds come in a variety of colors and sometimes change color as they go through their life cycle. Since "black mold" (Stachybotrys chartarum) gets all the attention, that seems to be where we start. As for whether or not it's mold, especially black mold, at HomePro Inspections, we like to say "organic growth" until we have taken samples, tested them, and know what it really is.

 “Organic Growth” from a leak under a sink

Where do we start?

Typically, when a client calls and wants mold testing, we start with a few questions. Do you physically see what you think is mold? Is the area wet? Is there a moldy smell in the area? Has there been leaking? Are occupants exhibiting allergy symptoms, headaches, etc. when in the home that go away when they are out of the home?

 Sometimes people call and want mold testing because someone who will be living in the home has severe allergies to molds or a compromised immune system. They just want the mold testing to make sure that there are no issues that will affect their known conditions.

 Mold does not affect everyone equally.

People will react to molds differently. Some people have no symptoms when exposed to mold, and some people react quite quickly.

 Several years ago, I was training a new home inspector. We entered a home that was unoccupied and had been empty for an extended period. We started the inspection process, and after about 5 minutes, the guy started sneezing, got a runny nose, and had scratchy eyes. I asked him if he was okay, and he said, “There’s mold in this house.” We headed downstairs. It smelled moldy in the basement, and we found wetness on the walls and carpeting. The walls had what appeared to be mold growing in the wet areas.

 What affected the other inspector did not affect me at all. Some people are more sensitive to things like mold than others. As with my inspector, people can have all or some of the symptoms, like a stuffy and/or runny nose, sneezing, trouble breathing, and watery, itchy eyes. Some people may develop a rash and itchy skin. Others may have headaches. People with asthma may have a more intense reaction to mold.

 Mold in the work environment

I had been hired to do mold testing in an older building that had office suites in it. The tenants complained that when they come to the office on Monday mornings, it smells a bit musty. Anywhere between a few hours and a day, several of the people working in the office started to have all or some of the symptoms listed above. In my interviews, people told me they typically felt fine before they came to the office.

 We did air testing and swab sampling of the affected areas and sent them off to the lab for analysis. During our inspection, we found some leaks in the HVAC system, surface mold in the ducting, and a large area where the carpeting was constantly damp.

The carpet tack strips on the basement floor are wet and deteriorated 

Outdoor molds

Repeated exposure to molds in the outdoor environment can also affect some people and produce allergic symptoms. For myself, I lived in the woods for about 26 years. During the last 4 to 5 years, I developed allergic reactions to the molds produced in the spring and fall. The molds that break down the leaves and other organic matter on the forest floor started to affect me after years of exposure.

 People who live in rural agricultural areas may have issues when the farmers are picking crops because of the airborne mold in the dust of the harvested leaves and grains.

An extreme example of mold on field corn 

Summary

There is no hard set of rules for how mold affects us. Like with most things in life, we are all different. Some people have little to no issues with mold, but with repeated exposures, they may develop minor to severe symptoms. Others with immune deficiencies or other respiratory sensitivities may have severe reactions to mold.

 Keep in mind that what is shared here is general in nature and based on my experiences as to the effects mold may have on an individual. If you are having symptoms and think they are being caused by mold, you should seek medical advice from your doctor.

 At HomePro Inspections, although mold testing is not part of a home inspection, our home inspectors are trained to look for and report any potential issues they may come across. Any issues are documented in your home inspection report and recommended for resolution by a qualified professional.

 Visit our website to learn more or to schedule your home inspection in the Rochester, Owatonna, and Faribault, MN areas. You can contact us today at (507) 202-8942 or utilize our online “Schedule Now” feature to set up an appointment.


Mold and Dampness Basics

Is it common to have mold in buildings?

The answer is yes; mold is very common in homes and buildings. If you have areas of your home that are high in moisture, you have the potential for mold. Leaks around windows, doors, plumbing, or roofs, and wet basements or flooding are areas with potential for mold. If consistently wet, mold will grow on wood, sheetrock, insulation, ceiling tiles, carpeting, and many other materials in your home. Given the right conditions, mold can grow on most any surface.

 What kinds of mold can grow in my home?

Cladosporium, Penicillium, and Aspergillus are some of the more common kinds of molds found in homes and buildings. There are others, but these are the ones that seem to be everywhere. And they are happy to quickly grow when and where the conditions are right.

 Penicillium mold spores

How does mold get into and grow in my home?

Molds are everywhere in our environment, indoors and outdoors, and play an important role in nature. For example, in nature, molds breakdown and decompose leaves and other organic materials to help nourish our soils.

 Open windows and doors are the most typical entry points for mold into a home. Mold spores can also be tracked into your home on your shoes and clothing. Pets can also bring mold into your home. When mold spores find themselves in areas of high moisture and the right temperature, they will grow. There are a multitude of areas in your home where building materials and the right amount of moisture provide suitable nutrients to encourage mold growth. Molds are very adaptable and can grow at varying levels of moisture, temperatures, and materials.

 What types of materials do molds grow on?

Materials that contain cellulose, like wood, ceiling tiles, paper products, and cardboard, provide the nutrients mold loves to grow on. When conditions are right, mold can also grow on a variety of other surfaces and substances, including paints, wallpaper, insulation, gypsum (drywall), carpets, and upholstery. Mold can even grow on dust!

 How does a person know if their house has a mold problem?

The best way to determine if you have a mold problem is through mold testing. Our home inspectors are trained to perform mold testing using a method of gathering and analyzing air samples. Unless visible, the source of a mold problem can sometimes be hard to find. If you have a larger mold issue, infestations can usually be smelled or easily seen, such as in basements or other confined or poorly ventilated areas.

 Moisture staining at the baseboard

 How can I keep mold out of my home?

As a part of your routine home maintenance, look for evidence of moisture or signs of mold. Conduct a thorough assessment of your home, paying close attention to any signs of flooding, infiltration, condensation, or leaks. If you find conditions that are conducive to causing mold, correct them right away.

 Potential mold at a window

 You can help control mold in your home by following the guidelines below:

·         Maintain humidity levels between 30% and 50%.

·         Fix any leaking pipes, roofs, or windows promptly.

·         Thoroughly dry and clean any areas where flooding has occurred.

·         Use exhaust ventilation in bathrooms, kitchens, and laundry areas.

·         Use your air conditioning during hot, humid weather.

 Summary

Mold is everywhere. The key is to perform periodic inspections of your home and to resolve any issues you may come across. Pay attention to musty odors, especially in damp basements and confined spaces. Controlling humidity and keeping these areas of your home dry will go a long way toward keeping mold to a minimum in your home.

 At HomePro Inspections, although mold testing is not part of a home inspection, our home inspectors are trained to look for and report any potential issues they may come across. Any issues are documented in your home inspection report and recommended for resolution by a qualified professional.

 Visit our website to learn more or to schedule your home inspection in the Rochester, Owatonna, and Faribault, MN areas. You can contact us today at (507) 202-8942 or utilize our online “Schedule Now” feature to set up an appointment.


Make a New Year’s Resolution to Take Care of Your Home

It’s the start of a new year, that time when we make resolutions. This year, why not make a resolution to take better care of your home? You don’t have to do all the projects at once; just make a plan and stick to it. Don’t forget, there are resources on the internet that address most anything. Do your research and keep your skill sets in mind as you tackle any project.

Make an assessment or inspection of your home.

If you’ve had a home inspection and were there when it was conducted, you may remember that your home inspector looked at a lot of aspects of your home. If you still have it, refer to your home inspection to get a general idea of what areas to cover. Go through the inspection report sections and make a plan for assessing each area of your home.

 Prioritize your findings based on severity (must do, should do, would be nice to do) or by category, like mechanical or cosmetic. Do whatever works for you. Think about costs and how you may want to or have to budget the projects.

 Set aside an emergency fund for home repairs.

Putting aside money every month can help to take the bite out of any unforeseen costs associated with the maintenance of your home. We usually recommend this during the course of a home inspection.

 Most experts recommend allocating 1% to 3% of your home’s value for maintenance or repairs. First-time homeowners can be overwhelmed by the “startup costs” of owning a new home. Having a maintenance fund can help take some of the stress out of having to pay for unexpected repairs.

 Perform annual heating and cooling maintenance.

It can be easy to ignore your HVAC (heating, ventilation, and air conditioning) systems. After all, they’re just supposed to work, right?

 We recommend annual maintenance of these systems. Maintaining your HVAC system will help it run smoothly and avoid major surprises and expenses. One of the most common HVAC notations our home inspectors make when inspecting HVAC systems is “System does not appear to have been maintained per manufacturer’s recommendation within the last year.” If you have a whole-house air-to-air exchanger, make sure to follow the manufacturer’s instructions for maintenance.

 Some utility companies offer programs that are add-ons to your utility bill and will cover your annual HVAC maintenance. These programs are well worth the money. An example our home inspectors share is that if your 90% efficient furnace is running at 80% efficiency, that’s another 10 cents of every dollar you spend on energy that is going right up the exhaust stack.

 Change your HVAC filters when specified.

Based on the type of filter your system requires, it should be changed based on the manufacturer’s recommendation. Dirty filters will not only compromise your home’s air quality, but they will also rack up increases in your energy costs. Dirty filters restrict air flow and make it harder for your HVAC system to efficiently move air. If the fan has to run longer and harder, that will result in higher energy costs. Whether you change your filter monthly, quarterly, or annually, having them on hand makes the task easy and can help you stay on schedule.

 Keep your dryer vent clean.

Clogged dryer vents make your dryer work harder and reduce efficiency. The frequency of cleaning your dryer vent will vary based on your family size, but it should be cleaned annually. If you notice that the dryer cycle is starting to increase, take the time to clean the dryer vent. Another reason to keep your dryer vent cleaned is to help prevent fire hazards. If you are not up to the task or if your dryer venting is hard to access, have the cleaning done professionally.

 Test and maintain smoke and carbon monoxide detectors.

For your family’s safety, make sure you are checking that your smoke and carbon monoxide detectors are tested with the test buttons per the manufacturer’s recommendation. In addition, make sure they are clean and the batteries are replaced regularly. Smoke and carbon monoxide detectors should also be replaced every 7 to 10 years. Our home inspectors commonly find units that are years past the replacement date.

 Check and clean your rain gutters and downspouts.

Keeping water away from the foundation of your home will help to avoid and reduce damage. If your roof is high and steep, we recommend you hire a professional. Keep in mind that an inch of rain on a surface area of 1000 square feet equates to roughly 630 gallons of water. Clean gutters and properly directed discharges will keep that water away from your home’s foundation.

 Inspect and maintain your door and window seals.

Door and window seals should be inspected and replaced as needed if they are damaged, loose, or worn. Reducing or eliminating leaks will save you money and keep your home more comfortable. Aside from obvious damage, using a smoke stick or lighter flame can help determine if you have a draft or leak that needs to be repaired.

 Clean your kitchen appliances.

Debris, dust, cooking splatters, and dirt can accumulate on, around, and under your kitchen appliances. Take some time to carefully pull out your appliances to clean around and under them. Keeping the cooling coils and compressor area of your refrigerators and freezers dusted and clean will help the appliance run more efficiently. Run your oven through the cleaning cycle, and make sure that any exhaust vent filters are regularly cleaned.

 Inspect your roof.

Inspect your roof regularly, especially after a storm and in the spring after the snow melts. If you are uncomfortable with walking on your roof or you feel it’s too dangerous, you can at the very least view it from the ground or eaves with binoculars. Look for damaged and/or deteriorated shingles, and make sure there are no tree branches or debris lying on or in contact with the roof. Repair, replace, or remove as necessary.

 Inspect and clean your fireplace chimney.

If you have a wood-burning fireplace, it is recommended that the firebox and chimney be inspected and cleaned annually. Depending on the use and system in your home, having it professionally cleaned will help the fireplace operate efficiently and safely. Gas fireplaces should be maintained annually to ensure efficient operation.

 Take care of your trees and shrubs.

Annual trimming and inspection of your trees and shrubs helps to prevent damage to your home. Trees are bare in the late fall and winter, which makes it easier to see any damaged, broken, or sagging branches. Keeping tree and shrub branches away from your siding and shingles keeps them from rubbing against them in the wind and causing damage. It also makes it harder for squirrels, chipmunks, and other animals to get on your roof.

Summary

Keeping your home maintained and running at peak efficiency will save you money and protect your largest asset. You may also gain some new skills and satisfaction from taking on some projects you have never tackled before. The items above are not all-encompassing. If you see something in your home that doesn’t seem right, address it sooner rather than later. Maintenance issues do not fix themselves and do not get better over time.

 At HomePro Inspections, our home inspectors are trained to inspect the areas addressed in this article. Any issues are documented in your home inspection report and recommended for resolution by a qualified professional.

 Visit our website to learn more or to schedule your home inspection in the Rochester, Owatonna, and Faribault, MN areas. You can contact us today at (507) 202-8942 or utilize our online “Schedule Now” feature to set up an appointment.

Preparing Your Home for a Home Inspection

Having a home inspection performed on your home, whether it is a pre-listing inspection or a buyer’s inspection, can be a stressful time for a homeowner. We get it… “Someone is going to be going through my house and picking it apart.” That’s not it. Our job is to simply provide an objective assessment of the condition of the home on the day of the inspection.

 Home Inspection

However, there are other ways to look at it.

As a homeowner, if you are doing a pre-listing inspection, we are trying to put you in control by providing you a list of items you may want to take care of before listing the home. We’re not there to call your baby ugly; we’re there to help you get your home in tip-top shape. This allows you to take care of things when and how you want.

 Of course, some things may seem picky, but you probably want to make sure that everything is corrected. The point is, you may be able to fix that leaky toilet valve or replace a defective GFCI on your own terms. A potential buyer may request that a plumber or an electrician perform these maintenance issues, which will cost you much more. Of course, if any of these tasks are outside your skill set or comfort zone, it’s always best to hire a professional.

 Preparation for a Home Inspection

Preparing for a home inspection from a home inspector’s point of view means making sure that everything is accessible. If we can’t get at it or operate it, we can’t fully inspect it. The following is a list of things you can do as the home seller that can help make the inspection process go more smoothly and be completed without having to make a second trip. Second trips cause delays, add costs, and create inconvenience for everyone involved.

 First and foremost, make sure all the utilities are turned on.

Electricity, gas, and water should be turned on and operating for the home inspection. Without utilities, there are a lot of aspects to the home inspection that we just can’t address. This seems like it should be common sense, but we run into it often enough that it’s worth mentioning.

 Our Standards of Practice state that we are not required to, nor should we, turn on any utility or light pilot. The last thing we want is for something to flood or explode; it may be shut off for a reason. If we are granted permission by a homeowner to turn on a valve and/or light a pilot, we will do so.

 If the utilities are not on, we have to disclose what we were not able to fully inspect and recommend that the appliance or system be inspected by a qualified professional after the utility has been restored.

 Gas pilots need to be lit. Most newer gas appliances have electronic ignitions, while older ones have standing pilots that have to be manually lit. This can also be the case for some newer appliances. In order for us to test the functionality of a gas appliance, we need to see it in operation.

 The most common appliances that are not lit are gas fireplaces, water heaters, and garage furnaces. Homeowners tend to shut off gas fireplaces and garage furnaces in the spring. Water heaters are commonly shut off in vacant homes.

 The electrical panel is hidden behind the ladder

Access

There are a lot of places a home inspector needs to access to do their job—places most people don’t even think about. The following is a list of common areas where we may have difficulty finding easy access or may encounter stored items. I’ve also included some interesting encounters I’ve had while performing home inspections.

 Attic(s): Attics are the most common area that we have trouble accessing. If the access is sealed, it has to be cut open. Although the Purchase Agreement has a statement allowing us to cut the access panel open, people forget and get upset when we cut holes in their home. Making sure that we have permission and access is a big help for us. If given permission, we will cut the access panels open.

 Garage: Detached garages need to be accessed during an inspection. Please remember that we will need a key or garage door opener.

 Electrical Panel(s): Home inspectors have to be able to safely remove the front cover of the access panel. Please make sure that there are no personal items stacked in front of the panel. This may include cabinets, shelves, and hanging pictures.

 Crawl Space: If your home has an access panel to the crawl space, please make sure we have clear access to it and that it is not locked. Sometimes we come across access panels that are sealed and nailed shut. If this is the case, we will not be able to inspect the crawl space.

 Furnace and Water Heater: Please make sure there is clear access for the home inspector. We need to be able to remove access panels to inspect these appliances.

 Blinds and Window Coverings: To help the home inspector, please open all blinds, drapes, and curtains. Although it’s an exceptionally rare event, it is possible for window coverings to become damaged during a home inspection. They can also take a lot of time to open and close during the course of the home inspection.

 Appliances Are Plugged In: If an appliance is functional, it should be plugged in. If a stove, refrigerator, or dish washer is unplugged, we will assume it is unplugged for a reason.

 Pets: Please secure your pets. More than once, I’ve had a cat scoot out the door as I was entering a home, garage, or crawl space. One time I had a pit bull freak out when I turned on my flashlight to look under a kitchen cabinet. Luckily, the homeowner was there to grab the dog before it came after me. Apparently, he was a rescue pet with some past flashlight issues. Another time, when I was inspecting a home on a farm, the homeowners had “free-range” chickens. The chickens followed me around and were underfoot the entire time I was inspecting the exterior of the home. I guess they thought I had food for them!

 Summary

A home inspection can be stressful for both the buyer and seller of a home. Taking some time to prepare the home for a home inspection can help the home inspector do their job more thoroughly and efficiently.

 At HomePro Inspections, our home inspectors are trained to inspect all areas of the home. Having proper access will help your home inspector perform their job efficiently and thoroughly. Any issues found are documented in your home inspection report and recommended for resolution by a qualified professional.

 Visit our website to learn more or to schedule your home inspection in the Rochester, Owatonna, and Faribault, MN areas. You can contact us today at (507) 202-8942 or utilize our online “Schedule Now” feature to set up an appointment.

Replacing Exterior Door Weatherstripping

It’s winter, and now you can really notice the leaky draft at the front door. Replacing worn or damaged weatherstripping will not only keep your home more comfortable, but it will also help to reduce your energy consumption, and your furnace will not have to work as hard. And, of course, doing this before the cold weather hits will make the job easier.

Exterior door weatherstripping

According to ENERGY STAR®, weatherstripping can save you up to 20% on your heating and cooling costs. Typically, someone with basic skills can tackle most weatherstripping projects. It’s relatively simple, but you need to make sure that you are using the best products for the job at hand and installing them correctly.

 Exterior door weatherstripping and threshold

Assemble your tools and materials

·         Tape measure

·         Screw drivers

·         Scissors

·         Cleaning supplies

·         Replacement weatherstripping

·         Replacement door sweep

 Steps to replace your weatherstripping

·         Prepare the area

Remove as much of the dirt and debris as possible. Clean the area with hot, soapy water. Use sandpaper or stronger solvents to remove any residue that the hot, soapy water doesn’t remove.

 ·         Tighten your door hinges.

People never think of their door hinges. Lift on the door handle to make sure there is no play or looseness. Tightening the hinges ensures that the door will sit squarely in its frame and that it will close properly.

 Door hinge

 ·         Take measurements and determine the type of weatherstripping you need

Measure the width as well as how tall your door opening is to determine how much weatherstripping you will need. Many of the more modern doors use similar products. Define the products needed and how much you will need. Many of the big-box stores will have several choices and kits for replacing the more popular and commonly used products. There are pros and cons to varying choices of weatherstripping. Now is not the time to be cheap. Spend the money and buy the best product for your job.

 ·         Remove the old weatherstripping and door sweep

The weatherstripping and door sweep on most modern doors are typically installed by being pressed or inserted into a slot in the door frame or door itself. Most times, you can simply pull the old weatherstripping out with little effort, unless it has been adhered in place with paint.

 Door sweeps can sometimes be removed with the door in place. If this is too difficult, it may be faster just to remove the door from the hinges. You will probably need some additional help with this.

 Door sweep at the bottom of the door

·         Remeasure and cut the weatherstripping to length

The pre-cut replacement weatherstripping is typically a bit longer than the actual door opening. Remeasure and cut the weatherstripping to length. Check the length and adjust if necessary for the best fit. Slide the new weatherstripping into the appropriate slot in the frame. Double-check the length of the door sweep and cut as necessary.

 ·         Confirm fit and function

Open and close your door to make sure that the fit and function of your new weatherstripping are correct. Keep in mind that the new weatherstripping may cause your door to open and close a bit harder. Over time, this will ease up as the weatherstripping sets in place.

 Summary

Replacing your exterior door weatherstripping will take an hour or so and is relatively inexpensive. The process is simple and is one of the more cost-effective ways to save money on your home heating costs. It also helps to keep rain, insects, and rodents out of your home.

 At HomePro Inspections, our home inspectors are trained to inspect the weatherstripping and function of the door seals and identify any defects. Any issues are documented in your home inspection report and recommended for resolution by a qualified professional.

 Visit our website to learn more or to schedule your home inspection in the Rochester, Owatonna, and Faribault, MN areas. You can contact us today at (507) 202-8942 or utilize our online “Schedule Now” feature to set up an appointment.


Caulking Around a Kitchen Sink

The kitchen sink...probably the most-used feature of your home. We use it to wash dishes, get a drink of water, fill the pet’s water bowl, and rinse things. All that use can result in some wear and tear on the caulking around your sink.

 Why would the caulk need to be replaced?

Caulk is an integral part of sealing around your kitchen sink. It helps to prevent water damage to the countertop as well as the cabinet and contents beneath the sink. Leaks around a sink can result in mildew, mold, and potential water damage.

 As home inspectors, we check the caulking around sinks. It’s important to look up and under sinks for water damage as part of our home inspection process. As a homeowner, that’s an important inspection for you to make on occasion or if you think there may be an issue.

 Caulking a sink is relatively simple.

In a few short steps and with a little patience, you can replace the caulk around a sink. We will run through the basic steps below.

 Choose the proper caulk (sealant).

You will want to choose a caulk that matches your countertop surface as well as your sink. You will also want to choose the right type of caulk that will work best with the surfaces you are caulking. Silicone is a good choice for most applications, but if you are working with an acrylic surface, you may need a different type of caulk. Ask for help or take some time to read the varying product labels to see what type of caulk will work best for you.

 Clean the surface before caulking.

Now it’s time to clean the surface you will be caulking or re-caulking. If there is old caulk to be removed, you will need a utility knife or a flat razor to cut away the old caulking. Be careful not to damage any surfaces. Also, make sure to wear the proper personal protection, such as gloves, safety goggles, etc. If there are any residual or small pieces of caulk left over, you can use rubbing alcohol to try and remove them.

 When all the old caulk has been removed, use mineral spirits to clean the surfaces of any residue or oils. Wipe the area to be caulked with a clean, dry cloth, and let the area air dry.

 Prepare the surfaces where the caulk will be applied.

Once the surface has been thoroughly cleaned, it’s time to apply the caulk. One easy prep trick is to apply painters tape to the surfaces adjacent to the seam you are caulking. You can then lay your bead of caulk, wipe away any excess, and, when finished, remove the tape to leave a nice, straight, clean line.

 Cut the tip of the caulk tube and load the caulk gun.

Determine the approximate size of the caulk bead you will be applying and cut the tip of the caulk tube at a 45-degree angle accordingly. You then have to use a long nail or the pivoting wire attached to the bottom of the caulk gun (if so equipped) to break the seal in the top of the caulk tube. Place the caulk tube in the caulk gun and push the spring-loaded piston up against the end of the caulk tube. Squeeze the trigger until caulk starts to come out of the end of the caulk tube.

 Caulking gun

 Apply the bead using the proper speed and pressure.

This can take some practice if you are a beginner. Try to keep constant pressure on the trigger as you slowly draw the tip of the caulk gun through the seal you are caulking. Applying just the right amount makes it easier to finish and blend the caulk seam. Too much caulk, and you are left with a lot of cleanup.

 Laying a bead of caulk using painters tape as an edge

 Shaping caulk at the seam using a caulk tool and cleanup

 How much is this going to cost?

If you don’t have the necessary tools, buying what you need is going to be the biggest cost. The caulk itself isn’t that expensive. If you hire someone, the labor cost will be your biggest expense. Most projects completed by a handyman will cost you anywhere from $150 to $400. Make sure to get a couple of bids, as prices may vary depending on who you call.

 Summary

Caulking your kitchen sink can appear to be a pretty simple project. It is, but you have to have the proper caulk, the right tools, a little skill, and some patience. If you think you may have some future caulking projects, you can invest in the tools and maybe become the neighborhood expert. Also, if you have the tools and a full tube of caulk, after careful inspection of other areas of your home, you may just find some other projects.

 At HomePro Inspections, our home inspectors are trained to inspect the caulking around sinks, tubs, and showers and identify any defects. Any issues are documented in your home inspection report and recommended for resolution by a qualified professional.

 Visit our website to learn more or to schedule your home inspection in the Rochester, Owatonna, and Faribault, MN areas. You can contact us today at (507) 202-8942 or utilize our online “Schedule Now” feature to set up an appointment.


Ice Dams, What They Are, and How to Prevent Them

Winter is here, and so is the potential for ice dams. It’s one thing to have icicle formation after some warm weather, but quite another if these icicles are a result of ice dams. To reduce the potential for damage to your home, it’s important to understand how ice dams form, how they can impact your home, and methods to prevent them from forming.

 Ice dam at the roof edge

 What is an ice dam?

Icicles can form at the bottom edge of a roof line or on gutters when water gets cold enough to freeze. If water is running down your roof and it is at or near freezing, the water that drips off the edge starts to form icicles.

 As gutters fill and freeze, they become heavy and can cause damage to your gutter system. If the water continues to build up, it creates an ice dam at the eaves, which will not allow water to flow over the edge of the roof. This water can find its way under the roof coverings and into your eaves, or worse, your walls and ceilings.

 Icicles and ice dams are a sign of a larger problem with the house. When the roof covering is warmer than the eaves, even in below-freezing temperatures, ice dams can form.  

What are the main causes of ice dams?

The two main causes of ice dams are poor insulation and inadequate ventilation in the attic space. If your home has minimal or poor insulation, heat from within your home will rise into the attic space and warm the roofing materials. Snow on those surfaces will melt and flow to the edges of your roof. The overhangs on your roof will be colder than the attic space. Once that water hits the edge, it will start to freeze and build up.

 How an ice dam forms

Inadequate ventilation will result in condensation building up on the bottom of the roof decking. Moisture from inside your home will find its way into the attic space. Condensation on the roof decking and structural materials may cause staining and/or moisture damage.

 Our home inspectors will look for signs of moisture staining and evidence of ice dams when performing your home inspection. In the winter, when we're inspecting an attic space, we often see frost on nails and other metal fasteners where there may not be adequate ventilation.

 On one home inspection years ago, I saw icicles in the attic space of an older home that had very little attic space ventilation. Photos were taken, and the condition was noted in the home inspection report.

 How can I prevent ice dams?

Most times, this issue can be resolved fairly easily. The best course of action to prevent ice dams would be to increase the insulation and improve the ventilation in the attic space. If the roof is not warm, the snow that falls on it will not melt easily. The best-case scenario is for the roof to be at a temperature matching the outside air. This keeps snow from melting and refreezing at the eaves.

 Some older homes do not allow for additional insulation in the area where the exterior wall meets the slope of the roof. If this is your case, you might try one or more of the options below.

 Sometimes, heating tapes or cables can be installed to melt ice dams at the eaves and create pathways for the water to flow from the roof. Adding heating tapes or coils addresses the symptom but not the conditions that create the ice dams. Again, your first course of action should be to review the insulation levels and ventilation of your attic space.

 Another measure of prevention is to use a roof rake to pull fresh snowfall from the eaves of your home. Pulling the snow from the eaves will allow the sun to keep this part of your roof warm, thus helping to reduce ice dams. You will want to be extra careful not to damage the roof surface when using a roof rake. Again, however, this does not resolve the root cause of ice dam formation.

 Using a roof rake to prevent ice dams

 At HomePro Inspections, our home inspectors are trained to inspect your attic space and identify any defects that may lead to damage. Any issues are documented in your home inspection report and recommended for resolution by a qualified professional.

 Visit our website to learn more or to schedule your home inspection in the Rochester, Owatonna, and Faribault, MN areas. You can contact us today at (507) 202-8942 or utilize our online “Schedule Now” feature to set up an appointment.


Replacing Your Washing Machine Hoses

One of the questions our home inspectors get quite frequently during a home inspection is “How do you replace washing machine hoses?” Fortunately, it’s a simple and relatively inexpensive process.

 Hot and Cold Washing Machine Hoses

 Washing machine hoses are one of those things in a home that are, for the most part, out of sight and out of mind. They are neglected, and unfortunately, a leak or some flooding may happen before they get the attention they deserve.

 Our home inspectors come across washing machine hoses during inspections that may be leaking and have corroded connections. Sometimes our home inspectors find hoses with a large bulge in them that looks like it is about to burst.

 Before You Get Started

Visit your favorite hardware or big box store and purchase a good set of washing machine hoses. This is not something you want to skimp on. I recommend a quality set of stainless-steel braided hoses. These are going to cost in the range of $30 to $35.

 Tools and Supplies

·         A large pair of channel lock pliers

·         Bath towels

·         5-gallon bucket

 Steps to Follow for Replacing Your Washing Machine Hoses

 Turn off the water supply to the washing machine.

If you are lucky, this will be simple. There should be a service box in the wall or plumbing within a few feet of the washing machine that your washing machine hoses are connected to. Older homes with the laundry room in the basement may have old, corroded valves that may take a little work to close. If so, take your time and don’t force things. You don’t want to break a valve. If it looks like it may be beyond your skill set, it might be time to call a plumber.

 Unplug the washing machine.

You may have to slide the washing machine away from the wall to get to the electrical plug and outlet. Unplug the washing machine to prevent an accidental shock. Sliding the washing machine away from the wall will also give you clear access to the washing machine’s hoses and valves.

 Place one of your old bath towels on the floor below the washing machine hose hookups and have your bucket in place. There will be water in the hoses and most likely a little pressure, so you want to be ready to contain any leaks or dripping.

 Disconnect the old washing machine hoses.

Washing machine hose connections are similar to a garden hose. Use your channel lock pliers to disconnect the end attached to the washing machine first. Remember: “Righty-tighty, lefty-loosey.” Place the disconnected end of the washing machine hose in the bucket, allowing the water to drain. Now disconnect the other end from the supply. Repeat for the other hose.

 Be careful not to squeeze the pliers too hard, as the connections at the washing machine may be plastic. Also, pay attention to which washing machine hose is hot and which is cold.

 Disconnecting, Connecting with a Channel Lock Pliers

 Connect the new washing machine hoses.

Washing machine hoses, as we said earlier, are similar to a garden hose. Both ends have the same connector, so everything should hook back up pretty easily.

 Attach the hot supply valve to the hot connector on the back of the washing machine, and the cold to the cold. Finger-tighten the washing machine hose connections first, then use your channel lock pliers to tighten them securely.

 Note: Sometimes it can be easier to do one hose at a time, so you don’t accidentally get the hot and cold mixed up.

 Turn the water supply back on.

Turn the water supply back on slowly, one valve at a time. Take a minute to observe and confirm that there are no leaks and that the connections are tight. Open the valve completely once you are sure there is no leak.

 Once you are sure the first hose is okay, repeat the process for the other hose. Keep an eye on the newly installed washing machine hoses for a while before sliding the washing machine back up to the wall and reconnecting power. Keep your bucket, pliers, and towels handy in case there are any drips or leaks that need to be addressed.

 Summary

You may not be able to call yourself a plumber just yet, but changing your washing machine hoses is a relatively simple project. It takes a little bit of time, but this easy DIY project can save you some money. If you are uncomfortable with any part of the process, it’s okay to call a plumber.

 At HomePro Inspections, our home inspectors are trained to inspect plumbing systems and identify any defects. Any issues are documented in your home inspection report and recommended for resolution by a qualified professional.

 Visit our website to learn more or to schedule your home inspection in the Rochester, Owatonna, and Faribault, MN areas. You can contact us today at (507) 202-8942 or utilize our online “Schedule Now” feature to set up an appointment.

Winter is Coming: How Do I Light My Gas Fireplace?

Winter is coming, and we are getting a lot of questions from our home inspection clients on how to light their gas fireplace. The good thing is that most modern gas fireplaces are simple and easy to light with a few simple steps.

  Gas Fireplace

Per our standards of practice, if the pilot light in your gas fireplace is turned off, our home inspectors are not allowed to light the pilot. We will, however, show you the basics and point you to the manufacturer’s instructions.

 Gas Fireplace Basics

The modern gas fireplace works very similarly to most other natural gas or propane appliances in your home, such as furnaces, water heaters, and gas stoves.

 The gas is supplied to the gas fireplace through a gas line to the control valve. When the control valve is turned on, the gas will flow to the main burner and be ignited by an electrical igniter or a pilot light. The igniter works by electrically producing a spark to light the gas. You will find ignitors in newer gas fireplaces. A pilot light is a continuously lit flame next to the burner. A pilot light is the more traditional source of ignition in a gas fireplace.

 Manufacturer’s Instructions

Most gas fireplaces have a handy set of instructions printed on a metal plate that is chained to the unit in the access panel. It’s pretty typical to find this covered in dust. Use a damp towel to clean the instructions so that you can read them. Note that all gas fireplaces will have instructions unique to your particular model.

  Example of Manufacturer’s Instructions

Warning: Follow your manufacturer’s instructions exactly as printed. If you don’t, a fire or explosion may result, causing property damage, personal injury, or loss of life.

 Before Operating

Take some time to sniff around the gas fireplace area. Keep in mind that the gas is heavier than air and will settle towards the floor or bottom of the gas fireplace compartment. If you smell gas, immediately turn the valve off and call your gas supplier.

 Also keep in mind that some gas fireplaces have a remote, some have a switch on the unit itself for turning the fire on and off, while others may have a thermostat on the wall.

 Gas Valve, Control Knob, and Igniter Button

Basic Lighting Instructions

Locate the control knob on your gas fireplace. This is typically a knob that has "Off," "Pilot," and "On" printed on it. There will also be a red indicator below, next to the knob, showing which position the knob is in. Make sure the valve is in the "off" position.

 If your gas valve is in the off (closed) position, turn the valve to the on (open) position. Again, take a few minutes to sniff around for any gas leaks.

 Turn the control valve to the “Pilot” position. When you are ready to light the pilot, press the knob and hold it in place. This will start the flow of gas to the pilot.

 Press the igniter button, which is usually next to the control knob. Press the button about once every second until you see that the pilot light has lit. Sometimes the pilot will light right away, and sometimes it will take a few times before the pilot lights.

 Once you have your pilot light lit, continue to hold the control knob down for 15 to 30 seconds to make sure that it stays lit. This time can vary from unit to unit. If the pilot light goes out when you release the knob, repeat the steps until your pilot is lit. If the pilot light will not light, turn the gas valve off and call your gas fireplace service technician.

 Turn the control knob to the “On” position. If you have a switch on the gas fireplace, turn it on to light the burner. If you have a remote, use it to turn the fireplace on.

 Replace any covers you may have removed.

 Summary

Like other gas appliances, if your gas fireplace has a pilot light, there will be specific instructions on how it should be correctly lit. Our best advice? Refer to your owner’s manual or the manufacturer’s instructions on the metal plate previously described.

 As an example, the gas fireplace in my home has no pilot; it is all electronic. When I press the “On” button on the remote, the system electronically lights itself.

 At HomePro Inspections, our home inspectors are trained to inspect gas fireplaces and identify any defects. Any issues are documented in your home inspection report and recommended for resolution by a qualified professional.

 Visit our website to learn more or to schedule your home inspection in the Rochester, Owatonna, and Faribault, MN areas. You can contact us today at (507) 202-8942 or utilize our online “Schedule Now” feature to set up an appointment.

Fresh Air Vents and What They Do to Help Your Home Breathe

Over the years, homes have been built tighter and tighter to help save energy and keep the home warm. More efficient windows and doors, as well as air sealing in newer homes, have reduced random sources of air infiltration to almost nothing. The result is that it is harder for our homes to “breathe.” The more we do to help your home breathe, the healthier the air is for you to breathe.

 If you have gas-burning appliances in your home, such as a furnace, water heater, fireplace, stove/oven, or clothes dryer, they need oxygen to combust. That oxygen has to come from somewhere, and it has to be continuously replaced. Some people think that it doesn’t make sense to have a vent that brings cold air into their home in the dead of winter, but it actually helps because it creates a safer and healthier indoor environment.

 How Do Fresh Air Vents Work?

When explaining fresh air vents to my home inspection clients, I use the example of when I was young and growing up in a 1950’s vintage rambler home. When the furnace kicked on in the utility room, you could feel the cold air scooting along the floor from under the front door in the living room over to the air return across the room. You see, back then, we sat on the hard wood floor to watch the old black and white TV.

 Fresh air vents help our homes and gas appliances breathe easier by bringing the air into the home where it is needed most. Typically, a fresh air vent will be located in the utility or mechanical room where you may have a furnace, water heater, and possibly a gas dryer. Fresh air vents provide the air needed for proper combustion and prevent backdrafting and carbon monoxide buildup.

 Backdrafting

Let’s say, for example, that someone is cooking and running the exhaust vent in the kitchen, the exhaust vents in two of the three bathrooms are being used, and the clothes dryer is running. All of these are drawing air from within your home and venting it to the outside. Now the old water heater kicks on. If the old water heater has a standard atmospheric vent, the exhaust naturally rises up and out of the vent through the roof. Backdrafting is when the exhaust from a combustible appliance, like a water heater, is drawn back into your home instead of naturally drafting out of the roof vent.

 Why Fresh Air Vents Are Important

Without a source of fresh air through a fresh air vent intake, your gas appliances will use the oxygen in your home as fuel. This may also lead to an unhealthy buildup of carbon monoxide. A fresh air vent will provide the combustion air needed for your appliances to run properly.

 Identifying a Fresh Air Vent

During the course of a home inspection, our home inspectors confirm that there is a fresh air vent. The fresh air vent is typically found in the utility room next to the furnace and water heater. Many times, the utility room will also have a clothes dryer and a washing machine.

A Fresh Air Vent in a Utility Room

The fresh air vent will be a 6-to-8-inch duct that extends down to the floor, typically with a loop at the bottom, like the letter “J.” This duct may extend up through the home and into the attic or to a wall vent. Extending the vent to the attic prevents the force of wind from directly blowing into the vent.

 A Fresh Air Vent in an Attic

 What About the Cold Air?

Occasionally, during a home inspection, we will find rags, towels, or foam balls stuck in these fresh air vents in the utility room. Homeowners who do not understand the purpose of these fresh air vents think they are doing the right thing by blocking the cold air they feel coming into the room during the winter. Our home inspectors will explain the reasons for the vent and why the cold air is important.

 Summary

It is important to have clean air in your home to breathe. The good, clean air coming from the outside while the dirty air goes out is a good thing. You can thank your fresh air vent for that. Remember, don’t block that vent, and make sure it is clear to draw air into your home.

 At HomePro Inspections, our home inspectors are trained to inspect your HVAC systems and identify any defects. Any issues are documented in your home inspection report and recommended for resolution by a qualified professional.

 Visit our website to learn more or to schedule your home inspection in the Rochester, Owatonna, and Faribault, MN areas. You can contact us today at (507) 202-8942 or utilize our online “Schedule Now” feature to set up an appointment.


What Is a Water Hammer?

Have you ever heard a banging in your walls when you or another person turns off the water at the sink or tub? The sound can be unnerving and may lead to damage to your home. A water hammer may, over time, lead to a leak or burst pipe in your home.

 When HomePro Inspections performs a home inspection, our home inspectors listen for clues of a potential water hammer as we operate water valves in a home.

 What is water hammering?

Water hammering is the result of a surge of pressure when a water valve is closed suddenly. Water does not compress, so when a valve is closed, the flow is stopped instantly. It’s kind of like walking into a wall.

 A sudden stop in a water line can generate pressure up to three times that of the water flow pressure. That pressure can cause pipes to move, displace, or vibrate within your walls. Over time, that spike in water pressure may cause a leak or burst a pipe, causing water damage over an extended period of time or all at once. Fortunately, a water hammer can be fixed.

 Split water line

This video from “Practical Engineering” does a really good job of explaining what a water hammer is.

 What causes a water hammer?

There are several factors that can cause or contribute to a water hammer. One or more of these could be causing the banging in your walls.

 Water Pressure – High water pressure is one potential cause of a water hammer. The higher the pressure of the flow of the water, the higher the pressure when that flow is suddenly stopped at a valve.

 Appliances – Appliances that use water, such as a washing machine, dish washer, and even the water dispenser/ice maker on the refrigerator, can cause a water hammer. The water valves on these types of appliances shut off quickly.

 Watch the flexible water supply hoses on the washing machine or the coil of copper at the back of your refrigerator when the water is shut off. The flexibility in these lines helps to absorb some of the energy, but they can still shake, move, or wiggle quite a bit when the valve is shut off.

 Loose Pipes – Having some flexibility in the water lines in your home can help with dampening a water hammer’s energy. If they are in contact with your walls or structure, you may hear banging. Modern PEX water lines do a better job at dampening than rigid copper water lines. However, too much movement in rigid copper water lines may result in cracked solder joints and leakage. Long runs of copper water line with minimal support are prone to excessive movement.

 Leaking joint at the elbow

 Old Plumbing Systems – Because older water plumbing systems lack modern plumbing standards, they can be prone to water hammer. Sometimes, during a home inspection in an older home, our home inspectors will find bladder tanks and pressure relief valves in the water supply system. These devices will help to mitigate water hammering.

 Fixing a water hammer

There are several possible solutions to eliminate a water hammer problem. Depending on the issues you may be having with your plumbing system, one or more of the following fixes may be needed to eliminate a water hammer in your plumbing system.

 Water Pressure Regulators – Managing the water pressure within your plumbing

system with a water pressure regulator can prevent surges or higher water pressures.

 Water Hammer Arrestors – These devices are installed in your plumbing system to absorb the shock in a water line when the flow suddenly stops due to the fast closing of a valve or faucet. Within the water hammer arrestor is basically a pocket of air or a bladder that will compress and absorb the higher water pressure when the water flow is suddenly stopped.


Below is a photo of a washing machine outlet box with water hammer arrestors integrated into the design. Washing machines, dishwashers, and refrigerators have valves that close quickly. Installing a water hammer arrestor in close proximity will eliminate a water hammer.

 Water Hammer Arrestor                     

Air Chamber/Bladder Tank – These are not as common. Our home inspectors come across air chambers and bladder tanks in older homes as a retrofit to older plumbing systems. They provide extra space for expansion and absorption of water pressure changes.

 Air Chamber/Bladder Tank

Pressure Relief Valves – These devices use an internal spring within the valve. Higher than normal water pressure will overcome the spring force and open the valve. Any water released can be routed to a drain.

 Pressure Relief Valve

 Loose Plumbing – Any loose plumbing should be secured to your home’s structure to keep it from banging. Although this may not be the root cause of the banging, securing pipes will help reduce the potential for cracking or loosening of any solder joints.

 Summary

Water hammers are at the very least annoying, depending on their proximity and loudness. In a worst-case scenario, if a leak develops and goes undetected for a period of time, it can result in serious water damage.

 At HomePro Inspections, our home inspectors are trained to inspect plumbing systems and identify any defects. Any issues are documented in your home inspection report and recommended for resolution by a qualified professional.

 Visit our website to learn more or to schedule your home inspection in the Rochester, Owatonna, and Faribault, MN areas. You can contact us today at (507) 202-8942 or utilize our online “Schedule Now” feature to set up an appointment.

Knob-and-Tube Wiring and Some Things You Should Know

When performing a home inspection on older homes built from around 1880 to the 1940’s, one of the things our home inspectors are on the lookout for is knob-and-tube wiring. Knob-and-tube wiring is the black cloth-covered wiring that was installed using the white ceramic “knobs” and “tubes” to support it and to protect it where it runs through wood.

Knob-and-tube in a wall cavity

 What is knob-and-tube wiring?

wiring system used in the early days of bringing electricity into homes. Knob-and-tube wiring isn’t inherently dangerous given its original conditions; however, it is a potential fire hazard and considered outdated by today’s standards. Many times, the initial installation of knob-and-tube wiring has been altered, added to, or covered with insulation in the attic space.

 How to identify knob-and-tube wiring

Knob-and-tube wiring is usually found in attics and unfinished basements or crawl spaces. This wiring is typically insulated in a black cloth-like material, is wrapped around ceramic knobs, and passes through ceramic tubes in the home’s framing. The hot and neutral wires are both black and run parallel to each other. Splices were done by removing a portion of the insulation, pig tailing or wrapping the spliced wire, and soldering them together. The splice was then heavily wrapped with cloth-like electrician’s tape.

Knob-and-tube with white insulation

 The potential dagers of knob-and-tube wiring

·         Unlike modern wiring, knob-and-tube wiring is not grounded. Grounding of electrical wiring in homes started in the 1960s.

·         Do-it-yourself or improper modifications may have been made over time. Sometimes these modifications were not soldered at splices, or the bare wires were left exposed. 

·         Modifications are prone to overloading the original circuit design. Adding to circuits to support modern electrical needs can overload knob-and-tube systems, resulting in fire.

·         There could be missing insulation, either due to rot and decay over time or from rodents chewing on the wires. Exposed wiring may lead to electrical shock or death.

·         Covering knob-and-tube wiring with insulation in attic spaces or walls does not allow heat to dissipate. This type of older wiring has a higher electrical resistance and will become too hot, possibly resulting in a fire.

·         Knob-and-tube wiring will become unreliable over time. Take notice of lights that flicker, warm switch plates, or sparks when plugging or unplugging devices at outlets.

Knob-and-tube in an attic space

 How does knob-and-tube wiring affect your insurance?

Obtaining insurance may be difficult if you have knob-and-tube wiring in your home. Some insurance providers will offer additional coverage for homes with knob-and-tube wiring, while others will deny coverage outright. Due to the increased potential for fire and damage to your home and personal belongings, insurance coverage for a home with knob-and-tube wiring may have higher premiums.

 Summary

Replacement of knob-and-tube wiring is not required by code, but if you have this type of wiring in your home, for safety’s sake, you should seriously consider having it inspected by a licensed electrician. When performing a home inspection, our home inspectors will clearly note knob-and-tube wiring in your home inspection report. Our practice is to “recommend further evaluation for adequacy and safety” by a licensed electrician. An electrician will be able to tell you if you have a hazard or not and if the knob-and-tube wiring needs to be replaced.

 At HomePro Inspections, our home inspectors are trained to inspect electrical systems and identify any defects. Any issues are documented in your home inspection report and recommended for resolution by a qualified professional.

 Visit our website to learn more or to schedule your home inspection in the Rochester, Owatonna, and Faribault, MN areas. You can contact us today at (507) 202-8942 or utilize our online “Schedule Now” feature to set up an appointment.