Replacing Exterior Door Weatherstripping

As colder weather settles in, have you noticed a chilly draft seeping in around the front door? If so, there’s a good chance the weatherstripping needs to be replaced. As every home inspector will tell you, replacing worn or damaged weatherstripping is crucial to maintaining a warm and cozy wintertime home environment. Proper weatherstripping helps make your home feel comfortable, reduces energy use, and decreases the workload for your furnace. The home inspection experts at HomePro Inspections offer the following advice and encourage you to check and replace worn weatherstripping before the cold weather settles in.

 Exterior door weatherstripping

According to ENERGY STAR®, weatherstripping can save you up to 20% on your heating and cooling costs. Usually, someone with basic skills can handle most weatherstripping projects. It’s fairly simple, but you must ensure you're using the best products for the job and installing them properly.

 Exterior door weatherstripping and threshold

Assemble your tools and materials.

·         Tape measure

·         Screwdrivers

·         Scissors

·         Cleaning supplies

·         Replacement weatherstripping

·         Replacement door sweep

 Steps to replace your weatherstripping.

·         Prepare the area

Remove as much dirt and debris as possible. Clean the area with hot, soapy water. Use sandpaper or stronger solvents to eliminate any residue that the hot, soapy water doesn’t remove.

 ·         Tighten your door hinges.

People often overlook their door hinges. Lift on the door handle to check for any play or looseness. Tightening the hinges ensures that the door sits properly in its frame and closes correctly.

Door hinge

 ·         Take measurements and determine the type of weatherstripping you need.

Measure both the width and height of your door opening to determine how much weatherstripping you'll need. Many modern doors use similar products. Identify the required products and the quantities needed. Most big-box stores offer several options and kits for replacing popular and commonly used products. There are advantages and disadvantages to different choices of weatherstripping, but now is not the time to be cheap. Spend the money and buy the best products for your job.

 ·         Remove the old weatherstripping and door sweep.

The weatherstripping and door sweep on most modern doors are usually installed by being pressed or inserted into a slot in the door frame or door itself. Most of the time, you can simply pull the old weatherstripping out with little effort, unless it has been glued in place with paint.

 Door sweeps can sometimes be removed while the door is still in place. If this proves too difficult, it might be quicker to take the door off the hinges. You may need some extra assistance with this.

Door sweep at the bottom of the door

·         Remeasure and cut the weatherstripping to length.

The pre-cut replacement weatherstripping is usually a bit longer than the actual door opening. Remeasure and cut the weatherstripping to the correct length. Check the length and make adjustments if needed for the best fit. Slide the new weatherstripping into the proper slot in the frame. Double-check the length of the door sweep and cut it as needed.

 ·         Confirm fit and function

Open and close your door to ensure the fit and function of your new weatherstripping are correct. Keep in mind that the new weatherstripping may make your door harder to open and close at first. Over time, this will improve as the weatherstripping settles into place.

 Summary

Replacing your exterior door weatherstripping takes about an hour and is quite affordable. The process is straightforward and one of the most budget-friendly ways to reduce your home heating costs. It also helps prevent rain, insects, and rodents from entering your home.

 At HomePro Inspections, our home inspectors are trained to examine the weatherstripping and the function of door seals to identify any defects. Any issues are documented in your home inspection report, with recommendations for repair by a qualified professional.

 Visit our website to learn more or to schedule your home inspection in the Rochester, Owatonna, and Faribault, MN areas. You can contact us today at (507) 202-8942, send us an email, or utilize our online “Schedule Now” feature to set up an appointment.


How to Properly Maintain Your Wooden Windows to Prevent Moisture and Damage

Wooden windows add classic charm and warmth to any home, but they need regular maintenance to stay at their best. Wooden windows can suffer from moisture damage without proper care, which may cause rot, warping, and expensive repairs. In this post, HomePro Inspections will share the best tips for maintaining wooden windows, helping protect your investment and keep your home in great shape.

 Below is a photo of a window (left) pointed out in an inspection report. On the right is the same window four months later, showing ongoing moisture damage and organic growth.

 Why Maintenance Matters for Wooden Windows

Wood is a natural material that expands and contracts with temperature and humidity changes. When neglected, wooden frames can absorb moisture, leading to paint peeling, wood swelling, and eventually rotting. Moisture damage not only affects the appearance of your windows but also reduces your home’s energy efficiency and structural strength. Regular maintenance is essential to prevent these problems and extend the life of your wooden windows.

 Key Steps to Maintain Your Wooden Windows

 Regular Cleaning

Dust and dirt can trap moisture against wood. Clean your windows and frames with a soft cloth and mild detergent at least twice a year. Avoid harsh chemicals that can strip away protective finishes.

 Check for Signs of Moisture Damage

Inspect the frames for peeling paint, discoloration, or soft spots. These indicate water infiltration. Detecting issues early helps prevent minor problems from becoming major repairs.

 Maintain Paint and Finish

A fresh coat of paint or sealant serves as a barrier against moisture. Repaint or reseal your wooden windows every few years, or whenever the finish starts to wear thin.

 Seal Gaps and Cracks

Use weatherstripping or caulk to seal gaps between the window frame and the wall. This prevents water from seeping in during rainstorms and also enhances insulation.

 Ensure Proper Drainage

Ensure the windowsills slope away from the house and that the drainage holes are unobstructed. Blocked drainage causes standing water, which speeds up moisture damage.

 Control Indoor Humidity

High indoor humidity can lead to condensation on windows, causing moisture issues. Use dehumidifiers, especially in kitchens and bathrooms, and ensure good ventilation throughout your home.

 How to Repair Minor Moisture Damage

If you find small patches of rot or moisture damage, act quickly. Remove any loose or rotten wood, treat the area with a wood preservative, and fill gaps with epoxy wood filler. Once dry, sand it smooth and repaint or reseal to restore protection.

 When to Call a Professional

While routine maintenance can prevent most problems, severe rot or structural damage might need professional repair or replacement. If you’re unsure about how serious the damage is, consult a qualified window specialist to evaluate and suggest the best solution.

 Summary

Proper maintenance is the best way to prevent moisture damage in your wooden windows. By following these simple steps, you’ll keep the beauty and efficiency of your home’s windows for years. Regular care not only saves money on expensive repairs but also keeps your home a comfortable, safe, and welcoming space.

 At HomePro Inspections, we are trained to look for these issues when inspecting a home. Any problems are documented and recommended for resolution by a qualified professional.

 Visit our website to learn more or to schedule your home inspection in the Rochester, Owatonna, and Faribault, MN areas. You can contact us today at (507) 202-8942, email us, or use our online “Schedule Now” feature to schedule an appointment.


The Costly Reality of Deferring Maintenance and Home Repairs

 Home ownership is a big step for many people, providing stability, comfort, and pride. However, required responsibilities—including important tasks like maintenance and home repairs—come with homeownership. Every home inspector will tell you that postponing or delaying minor repairs or maintenance tasks often leads to bigger and far more costly problems later on. The home inspection experts at HomePro Inspections will examine the effects of ignoring home repairs and maintenance. These problems will not fix themselves. You, as a homeowner, have to take action.

 Roofing

The exterior of your home is the first line of defense against the elements. Your roof is often one of the most neglected areas. It is exposed to harsh weather conditions such as rain, hail, snow, extreme heat, and penetrating cold. Over time, these conditions can cause weathering and wear and tear on your roof.

 Missing shingles, cracks, or leaks might seem minor initially, but ignoring them can lead to more serious damage later. Issues like water infiltration, mold growth, and structural problems may develop if small roof repairs are neglected. Regular inspections and maintenance are much more cost-effective than totally replacing a roof and fixing the resulting damage.

 Exterior Maintenance

Without proper maintenance, exterior elements like siding, paint, and trim can deteriorate over time, causing water infiltration, wood rot, and decay. Our home inspectors suggest regular cleaning, sealing, and repainting of your home’s exterior parts to protect them and prolong their lifespan. Ignoring these tasks can lead to costly repairs. Keeping your home’s exterior in excellent condition will boost curb appeal and raise your home's value.

 Plumbing Home Repair

Ignoring leaky faucets, clogged drains, or dripping pipes can lead to water damage, mold infestation, and even flooding in some cases. They may seem like minor nuisances, but these problems can signal underlying issues in your home's plumbing system. Additionally, hidden leaks or pipe corrosion can cause unseen structural damage to your home's foundation or walls. These issues can be expensive to fix. Regular inspections and fixing these problems early can save you from large plumbing bills.

 Furnace and Air Conditioning

Without regular maintenance, your heating, ventilation, and air conditioning system will become less efficient and more prone to breakdowns. These systems are essential for maintaining a comfortable environment inside your home. Worn-out components, dirty filters, and poor upkeep will lead to higher operating costs and energy bills.

 For example, a dirty filter will cause your furnace to use more electricity and run longer because it’s harder to push air through a restricted filter.

 Routine HVAC maintenance not only extends the life of your system but also helps you avoid expensive repairs or early replacements. In the end, it is a smart investment.

 Pests 

Rodents, spiders, ants, and other insects can cause serious damage to your home if left unchecked. These pests can compromise the structure, chew electrical wiring, and spread diseases and allergens in your living space. To prevent infestations and minimize potential damage, seal cracks, remove standing water, and conduct regular pest inspections. That small pile of sawdust on the windowsill could be an indication that carpenter ants are damaging your window frame or structural elements. Ignoring signs of pest activity can lead to costly repairs and expensive extermination treatments.

 Home maintenance may seem like a dull chore, but it's crucial for protecting the integrity and value of your biggest investment. Small repairs or upkeep tasks can turn into major problems that require expensive repairs or replacements if ignored. Being proactive and addressing maintenance issues quickly can help avoid the financial burden and inconvenience of major home repairs.

 At HomePro Inspections, we are trained to look for these issues when inspecting a home. Any problems are documented and recommended for resolution by a qualified professional.

 Visit our website to learn more or to schedule your home inspection in the Rochester, Owatonna, and Faribault, MN areas. You can contact us today at (507) 202-8942, email us, or use our online “Schedule Now” feature to schedule an appointment.


Fall Maintenance Tips to Prepare Your Minnesota Home for Winter

Expert Advice from a Home Inspector’s Perspective

 Minnesota’s beautiful fall is the perfect time to prepare your home for the tough winter months ahead. With icy winds and heavy snowfall, your property will face challenges. Taking proactive maintenance steps now can save you time, money, and headaches when temperatures drop. HomePro Inspections provides insights from its home inspection professionals, sharing essential fall maintenance tips to keep your Minnesota home safe, warm, and energy-efficient throughout winter.

 Check Roof Condition

Before the first snowfall, visually inspect your roof. Look for damaged, missing, or curling shingles, as these can allow water infiltration and lead to costly repairs. Also, examine the flashing around chimneys and vents, as well as the attic, for signs of leaks or moisture. Know your limits. Don't get on your roof if it is too steep, too high, or if you are uncomfortable with ladders and heights. Home inspectors often evaluate roofs from the ground or the eaves on a ladder if it is unsafe to walk on the roof.

 Inspect and Clean Gutters and Downspouts

Leaves and debris can quickly clog gutters and downspouts, leading to water backup and the formation of ice dams—a common problem during Minnesota winters. Home inspectors often discover water damage caused by neglected gutters during inspections. Keep your gutters and downspouts clear, check for leaks or sagging, and ensure water drains away from the foundation. Again, be cautious when using ladders.

 Seal Around Windows and Doors

Drafts can make your home uncomfortable and increase heating costs. Home inspectors often suggest inspecting for gaps and worn weatherstripping around windows and doors. Use caulk or foam sealant to fill cracks, and replace weatherstripping as needed. This simple maintenance can significantly boost energy efficiency.

 Inspect Attic and Basement Insulation

Proper insulation helps keep heat in and cold out. Check your attic and basement to ensure there’s enough insulation depth and coverage—areas where home inspectors often find issues. Add insulation where needed to meet local guidelines and cut energy loss.

 Heating System Maintenance

Schedule professional inspection and maintenance for your furnace, boiler, or heat pump. Replace or clean filters, check for proper operation, and ensure vents and chimneys are clear of obstructions. A home inspector will identify any signs of wear or malfunction, but proper and timely preventive maintenance can keep your system running smoothly during all seasons.

 Test Smoke and Carbon Monoxide Detectors

With windows closed and heating systems on, it is vitally important to ensure your smoke and carbon monoxide detectors are working properly. Home inspectors always check these devices during a standard home inspection. Unless the detector manufacturer states otherwise, smoke and carbon monoxide detectors should be tested monthly and have their battery replaced at least once a year. Smoke detectors should be replaced every ten years, while carbon monoxide detectors should be replaced every five to seven years. 

 Examine Your Home’s Exterior

Walk around your property and look for cracks in the foundation, loose siding, or peeling paint. These issues can allow moisture to seep in, freeze, and cause further damage. Make repairs before winter arrives—this is a typical recommendation after a home inspection.

 Maintenance for Winterize Outdoor Plumbing

Frozen pipes are a common winter woe in Minnesota. Disconnect garden hoses, drain outdoor faucets, and shut off water supply lines to exterior spigots. If you have a sprinkler system, follow the manufacturer’s instructions to winterize it properly.

 Trim Trees and Remove Dead Branches

Heavy snow and ice can cause overhanging branches to break, damaging your home or power lines. As part of your fall maintenance, trim back trees and remove dead limbs to help prevent winter storm damage. If any branches are near overhead power lines, it is best to contact your utility company.

 Prepare for Emergencies

Stock up on winter essentials like salt, sand, and snow shovels. Make sure your emergency kits include flashlights, batteries, water, and blankets. Minnesota winters can be unpredictable, so being prepared is a crucial part of home maintenance.

 Summary

Many fall maintenance tasks can be done yourself, but if you don't have the necessary skills, it is advised to hire a professional. Professionals may uncover hidden issues and provide peace of mind before winter arrives. Their expert eye can help you prioritize repairs and ensure your home is ready for whatever the season brings.

 By following these fall maintenance tips, you can safeguard your Minnesota home, increase comfort, and avoid costly repairs. Happy fall—and stay warm this winter!

 At HomePro Inspections, we are trained to look for these issues when inspecting a home. Any problems are documented and recommended for resolution by a qualified professional.

 Visit our website to learn more or to schedule your home inspection in the Rochester, Owatonna, and Faribault, MN areas. You can contact us today at (507) 202-8942, email us, or use our online “Schedule Now” feature to schedule an appointment.


Heat Pump vs. Air Conditioner: How Are They Different?

When assessing a home's heating and cooling systems—whether you're a homeowner, prospective buyer, or home inspector—it's crucial to understand the differences between a heat pump and an air conditioner. Both systems are key for controlling indoor temperatures, but their functions, components, and capabilities vary. This comprehensive guide explains the main differences, helping you make informed decisions during a home inspection. HomePro Inspections offers the following information to help you understand the difference between a heat pump and an air conditioner.

 Heat Pump

 What is a Heat Pump?

A heat pump is a flexible mechanical device that can both cool and heat a home, depending on the season. It operates on the same basic refrigeration cycle as an air conditioner but features a key component—the reversing valve—that enables it to work in two directions.

 How Heat Pumps Operate

A heat pump has similar parts to an air conditioner but includes the following:

·         Reversing valve

·         Defrost control (suitable for cold climates)

 During cooling mode, a heat pump works exactly like an air conditioner—removing heat from inside and releasing it outside. In heating mode, the reversing valve changes the refrigerant flow, allowing the system to gather heat from the outdoor air (even when it feels cold) and bring it inside.

 Key Features of Heat Pumps

·         Provides heating and cooling with a single system.

·         Generally, more energy-efficient for heating in mild climates than furnaces or electric heaters.

·         In very cold climates where outdoor temperatures are extremely low, supplemental heating (like electric resistance coils or a furnace) may be required.

 Air Conditioner

 What is an Air Conditioner?

An air conditioner is a mechanical system designed mainly to cool indoor spaces during warm weather. It operates by removing heat from inside the house and releasing it outside, making the indoor environment more comfortable.

 How Air Conditioners Function

The main parts of an air conditioner include:

·         Compressor

·         Condenser coil (usually located outdoors)

·         Evaporator coil (located indoors)

·         Expansion valve

·         Refrigerant

 The process begins when the refrigerant absorbs heat from indoor air as it passes over the evaporator coil. The warmed refrigerant is then pumped outside to the condenser coil, where it releases the heat. The cooled refrigerant then travels back inside to repeat the cycle. This process continues until the desired indoor temperature is reached.

 Main Differences: Heat Pump vs. Air Conditioner

 Heating Capability: The main difference is that a heat pump can function as both a heater and an air conditioner, whereas an air conditioner can only cool. Home inspectors often check for the ability to produce heat in cooling systems to identify a heat pump.

 Reversing Valve: A heat pump includes a reversing valve that enables it to switch the direction of refrigerant flow. This feature is not present in standard air conditioners.

 Energy Efficiency: When used for heating, heat pumps are generally more energy-efficient than electric furnaces because they transfer heat rather than produce it. Air conditioners do not offer heating and therefore require a separate heating system, which is often less efficient.

 Installation and Operation: Both systems appear similar externally and may use the same air handler, but a home inspector will check for specific controls and components to identify which system is installed.

 Climate Suitability: Heat pumps are preferred in regions with mild winters, while air conditioners combined with furnaces are more common in areas with very cold winters.

 Accurate Identification Is Important

Properly differentiating between a heat pump and an air conditioner influences:

·         Home valuation

·         Energy efficiency estimates

·         Recommendations for repairs, replacement, or upgrades

·         Understanding of utility costs and maintenance requirements

 For buyers and sellers, understanding the system type helps predict future energy bills, comfort levels, and upgrade options. For the home inspector, it’s an essential part of a comprehensive home inspection report.

 Advantages and Disadvantages

Heat Pump

·         Advantages: Year-round comfort, energy-efficient heating and cooling, often lower operating costs in temperate climates, single-system simplicity.

·         Disadvantages: May struggle to keep up in extremely cold climates, potential need for supplemental heat, higher upfront cost than a standard air conditioner.

Air Conditioner

·         Advantages: Effective cooling, well-suited for hot climates or homes with separate, robust heating systems, and typically lower initial installation cost.

·         Disadvantages: It requires a separate heating system, potentially higher operational costs if paired with an inefficient furnace, and is unsuitable for year-round temperature control without additional components.

 Maintenance and Inspection Considerations

 Both heat pumps and air conditioners need regular maintenance to run efficiently and reliably. During a home inspection, home inspectors should examine the following:

·         Age and overall condition of the unit

·         Refrigerant lines and insulation

·         Electrical connections and controls

·         Condition of coils and filters

·         Functionality of the thermostat

·         Signs of leaks, rust, or unusual noises

 Summary

Understanding the difference between a heat pump and an air conditioner is crucial during a home inspection. A home inspector should be able to identify either system, explain how it works, and note what it means for the home’s comfort and energy efficiency. Although both systems might seem similar at first, their functions and suitability for different climates and household needs vary greatly. Whether you're buying, selling, or just want to learn more about your home's HVAC system, making an informed decision helps ensure comfort, efficiency, and peace of mind.

 At HomePro Inspections, we are trained to look for these issues when inspecting a home. Any problems are documented and recommended for resolution by a qualified professional.

 Visit our website to learn more or to schedule your home inspection in the Rochester, Owatonna, and Faribault, MN areas. You can contact us today at (507) 202-8942, email us, or use our online “Schedule Now” feature to schedule an appointment.


Who Should Attend a Home Inspection—And Who Should Not

A Guide to Maximizing the Value of Your Home Inspection

 A home inspection is a vital part of buying or selling a house. It offers an opportunity for a professional home inspector to assess the home's condition, spot potential issues, and address questions about future repairs or maintenance. HomePro Inspections offers the following information to help you understand who should attend a home inspection and who should not, ensuring the process is thorough, efficient, and beneficial for everyone involved.

 A family in front of their new home

 Who Should Attend a Home Inspection

 The Home Buyer

As the primary stakeholder, the buyer benefits greatly from attending the home inspection. This is an important opportunity to walk through the property with the home inspector, ask questions, and gain a better understanding of the home's condition. Attending in person allows buyers to see issues firsthand, clarify findings, and receive advice directly from the inspector. At HomePro Inspections, we strongly recommend that buyers—especially first-time buyers—participate in the home inspection process.

 The Home Inspector

Naturally, the home inspector must be present to perform the inspection. The inspector’s expertise is central to the process—they assess the structure, systems, and components of the house and deliver an objective report on its condition. Their presence guarantees the inspection is thorough and adheres to industry standards.

 The Real Estate Agent

In our market, the buyer’s real estate agent usually attends the home inspection. Their role is to support the buyer, facilitate communication, help interpret the findings, and provide guidance. Having the agent present can also help address any issues that might affect the ongoing transaction.

 Who Should Not Attend a Home Inspection

 The Seller

If the home inspection is for the buyer, it’s not usual for the seller to attend unless the buyer requests it. Occasionally, it may not be possible for some homeowners to leave the property. The seller’s presence could make buyers uncomfortable and might hinder open discussion between the buyer and the home inspector. Occasionally, sellers can become defensive. We understand they are emotionally attached to their home, so we will do our best to have any discussions about defects away from the seller.

 Family and Friends

It’s an exciting time. New homeowners want to share their new home with family and friends. Although buyers might seek support from family or friends, it’s best to limit the number of attendees to just the homebuyers. 

 Too many people can distract the home inspector and decrease efficiency and focus. Constant questions can cause the inspector to stray from his process and may lead to missing some issues. 

 During a recent inspection, a buyer’s dad, who was also a contractor, was pointing out numerous items that did not meet current code. This caused a lot of anxiety for the buyers. Although his intentions were good, I had to inform the homebuyers that, while his dad was correct about some issues, the home was built according to the codes that were in effect at the time of its construction. Codes are updated over time, and just because a particular code doesn’t meet today’s standards, it doesn’t mean it’s a defect.

 Children and Pets

Home inspections are not suitable for young children or pets due to potential hazards and the need for undistracted attention. Inspections often require accessing attics, basements, and other less-safe areas, so it's safer and more efficient to keep children and animals elsewhere during the process.

 Your home inspection isn't a safe place for young children. When unsupervised, they can spill food and drinks, break items, create messes, and play with or move objects around.

 Contractors

If a buyer wants to bring someone with specialized knowledge, like a contractor, it should be approved in advance. It’s not the right time to get bids on remodel projects from contractors.

 A home buyer will benefit the most from their home inspection if they can give their full attention to the home inspector and not be interacting with contractors during the process.

 Best Practices for Attending a Home Inspection

 Be Punctual

Arrive on time and be prepared to spend some time, depending on the size and condition of the property.

 Come Prepared

Bring a notebook and any questions about the property. Reviewing the seller’s disclosure in advance can help you prioritize what to look for or ask about.

 Follow the Home Inspector’s Lead

Respect the inspector’s process and let them work systematically. Ask questions at suitable times and avoid interrupting their workflow.

 Conclusion

 The home inspection is an essential part of the real estate process. Making sure the right people, specifically the home buyer, the home inspector, and the buyer’s agent, are involved helps create transparency, clarity, and success. Conversely, limiting unnecessary attendees keeps the focus sharp and the process efficient. Following these guidelines allows you to maximize your home inspection's value and make well-informed decisions about your investment.

 At HomePro Inspections, we are trained to look for these issues when inspecting a home. Any problems are documented and recommended for resolution by a qualified professional.

 Visit our website to learn more or to schedule your home inspection in the Rochester, Owatonna, and Faribault, MN areas. You can contact us today at (507) 202-8942, email us, or use our online “Schedule Now” feature to schedule an appointment.


The Top 10 Lawn and Garden Tools Every First-Time Homeowner Should Have

A Home Inspector’s Guide to Essential Outdoor Equipment

Becoming a first-time homeowner is an exciting milestone, filled with dreams of a beautiful lawn, a thriving garden, and the satisfaction of personalizing your outdoor space. However, as any experienced home inspector will tell you, proper lawn and garden care isn’t just about appearance—it’s crucial for protecting your investment and ensuring successful home inspections down the line. Whether you’re looking to impress your neighbors, grow some vegetables, or simply maintain a safe and welcoming property, the home inspection specialists at HomePro Inspections want you to know that having the right tools and utilizing them correctly is the foundation of effective and proper lawn and garden care.

 1. Lawn Mower

The Heart of Lawn Maintenance

 A high-quality lawn mower is essential for any outdoor tool collection. For most homes with large yards, a gas or electric push mower works well, although riding mowers are better for bigger properties. The right mower keeps grass at the perfect height, encouraging healthy growth and improving your home’s appearance. Regular mowing helps prevent pest issues and uneven patches.

 2. String Trimmer (Weed Whacker)

Precision for Edges and Tight Spaces

 A string trimmer helps you reach areas that lawn mowers can’t, such as around trees, garden beds, fences, and walkways. Keeping edges neat not only enhances visual appeal but also prevents weeds from spreading into your lawn and garden.

 3. Leaf Rake

Essential for Seasonal Clean-Up

 A sturdy leaf rake is indispensable for gathering fallen leaves, grass clippings, and other debris. Removing debris prevents mold development, maintains soil health, and ensures your yard remains tidy year-round. Accumulated leaves and debris can lead to drainage issues and damage grass.

 4. Garden Hose with Adjustable Nozzle

Hydration for Lawns and Gardens

 Watering is essential for a lush lawn and vibrant garden. An adjustable nozzle offers flexibility for gentle flowers and high-pressure cleaning. Think about using a hose caddy or reel to stay organized and prevent tripping.

 5. Pruning Shears (Hand Pruners)

Control Over Plant Health

 Pruning shears let you trim shrubs, flowers, and small branches, promoting healthy growth and preventing overgrowth. Proper pruning keeps plants attractive and easy to manage while also reducing the risk of disease spreading in your garden.

 Overgrown shrubs can block windows, damage siding, or attract pests—issues that home inspectors might point out.

 6. Garden Shovel

Foundation for Planting and Digging

 A sturdy garden shovel is ideal for planting trees and shrubs, digging holes, edging beds, and moving soil or mulch. Select a shovel with a strong handle and a comfortable grip for maximum versatility.

 Proper grading and soil management around your home’s foundation help prevent water intrusion, which is a primary concern during a home inspection.

 7. Wheelbarrow or Garden Cart

Effortless Transport of Materials

 From soil and mulch to plants and yard debris, a wheelbarrow or garden cart is vital for transporting heavy or bulky items. It lessens physical effort and makes big projects much easier. Regular cleanup of debris helps ensure good drainage and prevents hazards.

 8. Hand Trowel

Precision Planting and Small Jobs

 A hand trowel is ideal for detailed tasks like planting bulbs, transplanting seedlings, or weeding. Its compact size makes it easy to maneuver in tight garden beds and containers. Frequent weeding with a trowel helps prevent invasive plants from taking over, preserving the integrity and value of your landscaping.

 9. Garden Gloves

Protection and Comfort

 High-quality garden gloves protect your hands from thorns, chemicals, and blisters. They also improve grip and keep your hands clean while digging, pruning, or raking. Wearing gloves can help prevent injuries and skin irritation, allowing you to perform consistent maintenance.

 10. Soil Rake (Bow Rake)

Leveling and Preparing Soil Beds

 A soil rake, also known as a bow rake, is essential for preparing garden beds, leveling soil, and spreading mulch or compost. It’s more durable than a leaf rake and built for heavier tasks. Healthy, well-prepared soil beds encourage strong plant growth, boosting curb appeal.

 Bonus Tools

Although these items are not strictly considered lawn and garden equipment, they can help keep your property well-maintained and ready for any home inspection:

·         Outdoor broom for sweeping patios and walkways

·         Sprinkler system or soaker hoses for automated watering

·         Edging tool for crisp garden borders

·         Loppers for thicker branches

·         Pest control products for preventative care

 Summary

Equipping yourself with these top 10 lawn and garden tools is a smart investment for every first-time homeowner. These tools not only make routine yard work easier and more enjoyable but also help you keep your outdoor space healthy and attractive. 

 Routine care with the right equipment keeps your lawn lush, your garden thriving, and your home looking great during any home inspection. By doing these small steps now, you’ll have a more beautiful, functional, and valuable property for years to come.

 From a home inspector's view, regular lawn and garden upkeep shows responsible property ownership and helps avoid surprises. At HomePro Inspections, we are trained to look for issues when inspecting a home. Any problems are documented and recommended for resolution by a qualified professional.

 Visit our website to learn more or to schedule your home inspection in the Rochester, Owatonna, and Faribault, MN areas. You can contact us today at (507) 202-8942, email us, or use our online “Schedule Now” feature to schedule an appointment.

Stairwell Safety and Why It Matters

When it comes to home inspections, stairwell safety is often a top priority for experienced inspectors. Stairwells are common in most homes, but they can pose serious safety risks if not properly maintained or built. Slips, trips, and falls on stairs constitute a large portion of household injuries each year, making stairwell safety a vital part of every inspection.

In this blog, the professionals at HomePro Inspections will cover the basics of stairwell safety and explain what every home inspector checks during a home inspection. Whether you’re a homeowner preparing for an inspection or someone aiming to improve your home’s safety, understanding key stairwell safety principles will help keep your household secure.

 A dilapidated stairwell

Why Stairwell Safety Matters

Stairs are more than just a way to move between levels—they serve as a central point for household traffic and, unfortunately, potential accidents. A poorly built or maintained stairwell can become dangerous, especially for children, older adults, or anyone with mobility issues. According to national safety statistics, thousands of injuries happen every year because of unsafe stairwells, many of which could be avoided with proper upkeep and regular home inspections.

 Key Stairwell Safety Inspection Points

During a home inspection, the home inspector will assess various aspects of a stairwell to ensure it meets safety standards. Here are the key checkpoints:

·         Stair Dimensions and Layout: Steps should be of consistent height and depth, usually with a rise between 7 and 8 inches and a tread depth of at least 10 inches. Uneven stairs pose a trip hazard and must be fixed.

·         Handrails: Strong, secure handrails are essential for stairwell safety. During a home inspection, the inspector will verify that handrails are installed at a proper height (usually between 34 to 38 inches above the tread) and extend continuously along the staircase. Loose or missing handrails are noted as a safety issue.

·         Guardrails and Balusters: For stairwells open on one or more sides, guardrails and balusters prevent falls. A home inspector will verify that guardrails are at least 36 inches high and that balusters are spaced no more than 4 inches apart to stop children from squeezing through.

·         Lighting: Proper lighting is crucial for stairwell safety. Poor illumination increases the chance of missteps and falls. A home inspection will evaluate whether stairwells have sufficient lighting at both the top and bottom of the stairs and if light switches are easily accessible.

·         Headroom: Stairwells must offer at least 6 feet 8 inches of clearance. Lack of enough headroom can lead to accidents and will be noted during a thorough home inspection.

·         Structural Integrity: The home inspector will check for signs of wear, damage, or instability in the staircase structure, such as creaking, loose steps, or rot. Any issues compromising the stairs' structural integrity must be repaired immediately for safety.

 Common Stairwell Safety Hazards Discovered During Home Inspection

A seasoned home inspector has encountered a range of stairwell safety hazards, including but not limited to:

·         Loose or missing handrails

·         Worn or slippery tread surfaces

·         Improper step dimensions

·         Inadequate lighting

·         Obstructions on stairs, such as clutter, carpets, or rugs that can shift

·         Insufficient headroom or clearance

·         Unsafe guardrail height or spacing

 Tips for Homeowners to Help Improve Stairwell Safety

While a home inspection by a certified inspector will identify specific issues, homeowners can take proactive steps to enhance stairwell safety daily.

·         Keep stairs clear. Do not place objects, shoes, or decorations on stairs. Even small items can be trip hazards.

·         Install sufficient lighting. Opt for bright bulbs, and think about motion-activated lights for added convenience.

·         Fix loose or broken steps. Quickly repair any creaks, cracks, or instability in the stair structure.

·         Add non-slip treatments. Non-slip strips, carpet runners, or textured paint can help prevent slipping in areas where necessary.

·         Check and maintain handrails. Inspect handrails regularly to ensure they are secure and properly anchored.

·         Childproof the stairwells. If you have young children, install safety gates at the top and bottom of stairs and regularly check that baluster spacing is safe.

 Summary

Remember, stairwells should never be overlooked. Stairwell safety is a vital but often neglected part of homeownership. Regular maintenance and proactive upgrades form the backbone of a safe household. By understanding the key features of a safe stairwell, you can keep your home a secure and inviting space for everyone. At HomePro Inspections, we are trained to look for these issues when inspecting a home. Any problems are documented and recommended for resolution by a qualified professional.

 Visit our website to learn more or to schedule your home inspection in the Rochester, Owatonna, and Faribault, MN areas. You can contact us today at (507) 202-8942, email us, or use our online “Schedule Now” feature to schedule an appointment.


Ungrounded Electrical Outlets – How A GFCI Can Help

When performing a home inspection on an older home, the inspectors at HomePro Inspections often encounter ungrounded electrical outlets. In older homes, it’s usually a 2-prong outlet receptacle. Occasionally, when someone tried to “fix” this problem years ago, they simply replaced the 2-prong outlet with a 3-prong outlet that isn’t hooked to a ground wire. In either event, the use of a Ground Fault Circuit Interrupter (GFCI) outlet can allow the ungrounded electrical outlets to be used safely.

 What are ungrounded electrical outlets?

Ungrounded electrical outlets are typically found in older homes with the original two-wire ungrounded system. This system was designed to include only the hot (black) and neutral (white) wires. They can also occur when the grounding wire detaches from the electrical outlet. Modern wiring uses a three-wire system, including a ground wire and hot and neutral wires.

 Why can ungrounded electrical outlets be dangerous?

Ungrounded electrical outlets are standard in many homes built before the early 1960s. That was the building method, but modern codes show they can be a safety risk. An ungrounded outlet, which lacks a ground wire, means there is no path for electricity to flow into the ground (earth) if there is a fault. A fault occurs when something shorts out, such as a shock or overheating, which can cause a fire. 

 In the 70s, most new electrical appliances, vacuum cleaners, and similar devices were being built using 3-prong plugs, and that created a hassle for many. I remember feeling frustrated because I always had to find an adapter, also known as a “cheater,” so the 3-prong appliance plug would fit into the 2-pronged outlet.

 The most common but incorrect “fix” was to replace the old 2-prong outlets with the new 3-prong outlets. Problem solved, right? No! This is dangerous! When you see a 3-prong outlet, you probably assume it is grounded, but in this case, it isn’t. The danger lies in what you can’t see—there’s no ground wire to protect you, and if there’s a short, you become the ground!

 What is a GFCI, and how can it help?

A GFCI, or ground fault circuit interrupter, is designed to protect people from electrical shocks. GFCIs monitor the current flowing through a circuit. If the GFCI detects an abnormal imbalance, it trips (opens) the circuit, thereby de-energizing it. This process prevents electrical shocks by stopping the flow of electricity before it becomes dangerous.

 It’s important to know that on a 2-wire ungrounded system, a GFCI outlet must be installed at each outlet. In this case, each outlet should be labeled “No Equipment Ground.” On a 3-wire system, the GFCI only needs to be installed on the first outlet of the circuit.

 These explanations are fundamental, and there are many factors to consider regarding current electrical codes. If you ever have questions or concerns about the safety of your electrical system, it’s always a good idea to consult a qualified electrician.

 Summary

First and foremost, it's crucial to understand what an ungrounded electrical outlet is and why it can be a serious safety hazard. An ungrounded electrical outlet lacks a ground wire connection. This means there is no path for the electricity to flow into the ground if there's a problem with the outlet or wiring. If not properly maintained, it can lead to electrical shocks or even fires.

 At HomePro Inspections, we are trained to look for these issues when inspecting a home. Any problems are documented and recommended for resolution by a qualified professional.

Visit our website to learn more or to schedule your home inspection in the Rochester, Owatonna, and Faribault, MN areas. You can contact us today at (507) 202-8942, email us, or use our online “Schedule Now” feature to schedule an appointment.

Mold Testing and Guidance

Mold is everywhere, so knowing its potential levels in your home is key to understanding what to do if it is affecting you and your family. Mold may be present in your home at any time of year. Mold levels can increase during a cool, rainy season or on hot, humid days of summer. We hope that the following guidance provided by the experienced home inspection professionals at HomePro Inspections provides you with a better understanding of the dangers of mold and some signs to watch for that may indicate mold testing or mitigation is needed.

        Extreme case of mold in a wet basement

What exactly is mold, and where can I find it in my house?

Mold is an organism that exists everywhere. Its role is to break down and decompose dead and decaying materials in nature, and it’s found both indoors and outdoors. Mold is never completely gone, and its presence is a natural part of the environment.

 Areas like wet basements, crawlspaces, and poorly ventilated attics are vulnerable to mold, or “microbial growth.” Places with persistent leaks can create conditions that support mold growth. These spaces often have that damp, musty “basement smell." Consider mold testing if you notice or suspect this damp, musty odor in your home.

 When and why should you have mold testing conducted?

If you see what appears to be mold in your home, it's important to identify and fix the source and remediate the issue to avoid unnecessary and harmful exposure to your family. Mold testing can verify that the problem has effectively been resolved once the mold has been removed and the source of the issue mitigated.

 Exposure to higher levels of mold spores often leads to health problems, and it can affect people differently. Particularly susceptible to the effects of mold are individuals with allergies, compromised immune systems, infants, and the elderly.

 Many clients request mold testing when buying new homes, especially if they or family members have asthma or other health issues that can be worsened by high mold levels in the air. They want to ensure the environment is safe before moving in.

 Another common reason for testing is when people move into a new home or host visitors who develop health symptoms they haven’t experienced elsewhere. For example, we recently tested the home of a couple whose young grandchild was fine everywhere else in the house except in the basement, where the child developed red, itchy eyes and sneezing.

 Here’s a brief overview of our mold testing process.

Any type of mold growing in your home can cause health issues, and responses to mold exposure vary greatly among individuals. If you suspect mold in your home, consider scheduling mold testing. Sometimes, the problem is obvious; other times, testing or sampling is the only way to confirm its presence.

 After booking an appointment, our mold technician will visit your home to perform sampling. They will review any concerns you have and inspect potential problem areas.

 During testing, we typically perform two types of samples: an air sample, which detects mold spores floating in the air, and a surface swab, which examines mold microbes on surfaces.

It’s important to note that mold testing alone cannot predict how you or your family will react to mold in your home. Identifying and removing the mold source is the best step to protect your loved ones.

 How long does mold testing take, and is it accurate?

Our testing usually takes about 30 minutes, including a routine visual inspection. It may take longer if visual issues are present or additional sampling is needed.

Once testing is complete, the samples are sent to a lab for analysis. The lab reports identify the types of molds found, common areas of growth, and symptoms associated with exposure.

 Recent advances in microbial testing have significantly improved accuracy, reaching about 99%. When protocols are correctly followed and user error is minimized, labs can reliably determine if mold is present and identify its types.

 In Summary

If you suspect there’s a mold problem in your home, it’s wise to have your house tested. Testing helps you decide what to do next, regardless of whether the mold issue is visually obvious or airborne. Mold testing is generally affordable and is an essential first move. Visit our website to learn more or schedule your mold testing in the Rochester, Owatonna, and Faribault, MN areas. Contact HomePro Inspections today at (507) 202-8942, send us an email, or use our online “Schedule Now” feature to set an appointment.

Air Conditioner Systems Require Regular Inspection and Maintenance

Air conditioners are essential to modern life. They provide that much-desired cool, dry relief during hot, humid summer days and help maintain healthy indoor air quality. However, like any machine, your air conditioning system requires regular inspection and maintenance to ensure it is operating at its best ability and peak efficiency. One often overlooked but essential part of this maintenance is keeping your air conditioner compressor coils clean. Dirty coils can decrease efficiency, shorten the lifespan of the system, and harm the overall performance of your unit. The experts at HomePro Inspections will explain why clean compressor coils matter, the issues caused by neglect, and how routine inspection and maintenance can significantly enhance and protect your air conditioner system.

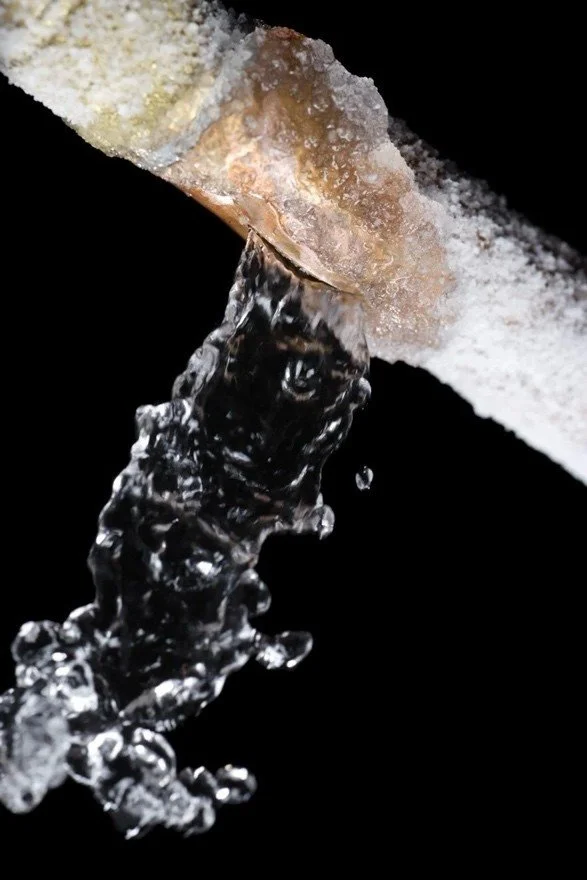
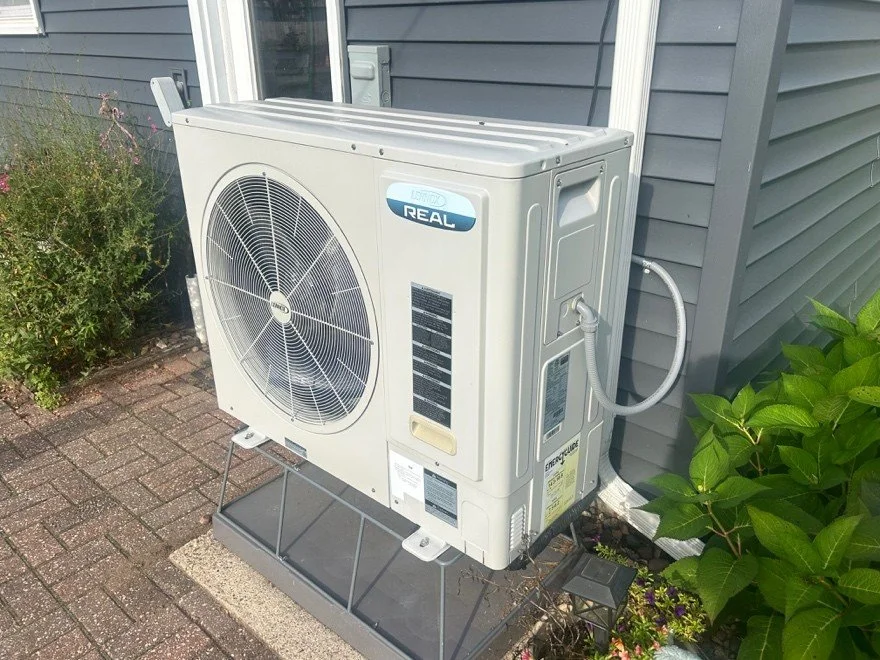
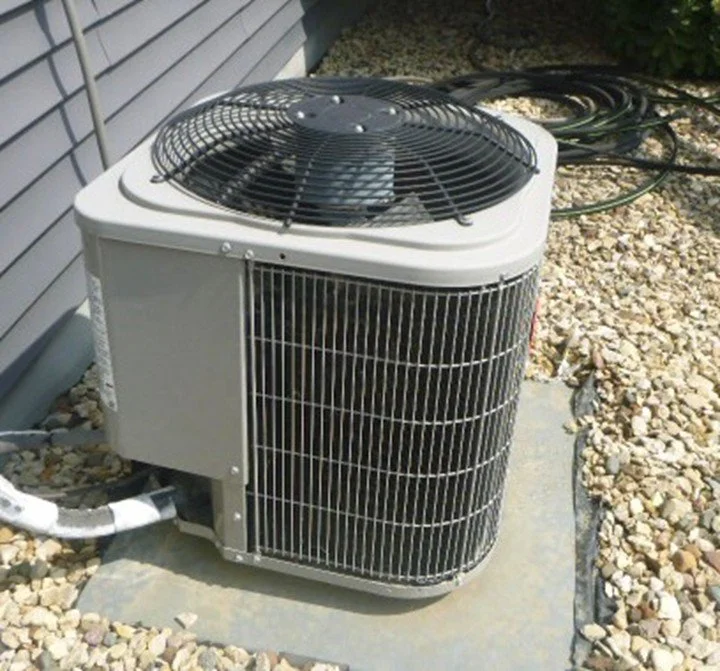
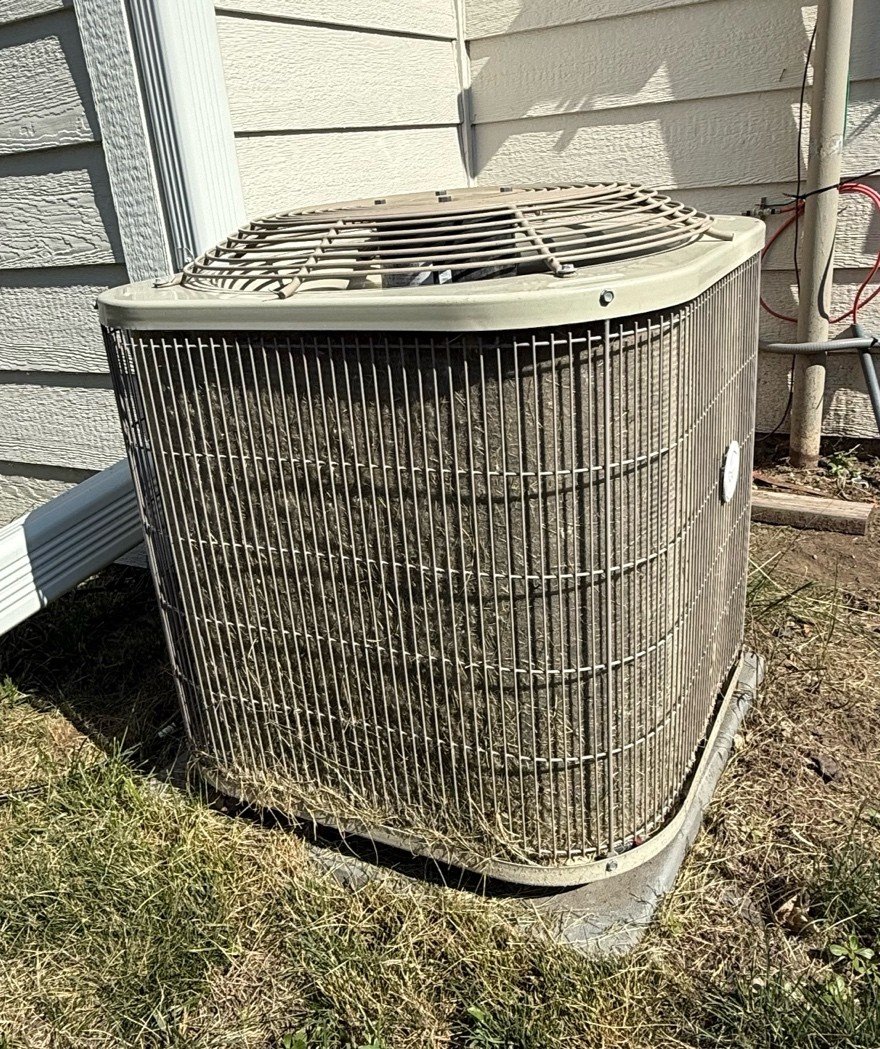
 Air conditioner with dirty compressor coils

Understanding Air Conditioner Compressor Coils

Before discussing the importance of cleaning compressor coils, it’s helpful to understand their role in the cooling process. An air conditioner has two main sets of coils: evaporator and condenser (or compressor). The evaporator coils absorb heat from the indoor air, while the condenser coils (located in the outdoor unit) release that heat into the outside environment.

 The compressor coils help transfer heat, allowing the refrigerant to go through its cooling cycle. If these coils get covered with dirt, debris, or grime, they can't effectively release heat anymore, which puts extra stress on your system.

 The Consequences of Dirty Compressor Coils

Dirty compressor coils can lead to serious problems, some of which are visible immediately and others that build up slowly. The following is what you risk by ignoring this essential maintenance task.

 ·         Reduced Energy Efficiency

When dirt and debris build up on the compressor coils, they form a barrier that hinders efficient heat transfer. Your air conditioner must work harder to reach the desired indoor temperature. This increased effort significantly boosts energy consumption, resulting in higher electricity bills. Keeping the coils clean ensures your air conditioner runs at peak efficiency, saving energy and money.

·         Increased Wear and Tear

When your air conditioner works harder than it should, it stresses the system’s parts unnecessarily. Over time, this can cause more wear and tear, shortening the lifespan of your unit. Dirty coils are often the leading cause of early system failure, which can be inconvenient and expensive to fix or replace.

·         Poor Cooling Performance

If you’ve noticed that your air conditioner no longer cools your home as effectively as it once did, dirty compressor coils might be the cause. The inability to release heat efficiently means your system struggles to maintain a comfortable indoor temperature, leaving you frustrated and quite uncomfortable during the hottest days of the year.

·         Risk of System Overheating

A system that works harder because of dirty coils risks overheating. This can cause the compressor to shut down or even permanently damage this crucial (and costly) component. Preventing dirt buildup is much easier and cheaper than fixing or replacing a failed compressor.

·         Environmental Impact

A dirty air conditioner's coils use more energy, hitting your wallet and increasing your carbon footprint. Keeping the coils clean is an easy and effective way to lower energy use and reduce environmental impact.

 The Benefits of Routine Coil Cleaning

Now that we have examined the risks of neglecting your compressor coils, let’s consider the benefits of keeping them clean.

 ·         Improved Energy Efficiency

A clean set of compressor coils ensures optimal heat exchange, making your air conditioner more energy-efficient. This results in lower utility bills and a greener cooling option.

·         Longer System Lifespan

Regular maintenance, such as coil cleaning, helps reduce stress on your air conditioning system and extends its lifespan. By performing this simple task, you can prevent costly repairs and replacements in the future.

·         Improved Indoor Comfort

Cleaning coils leads to better cooling performance. Your air conditioner will operate more efficiently, reaching and maintaining your preferred temperature for optimal comfort.

·         Cost Savings

Cleaning your compressor coils might require a small initial cost, but the substantial long-term savings from lower energy bills, fewer repairs, and longer system life will greatly outweigh the small short-term expense.

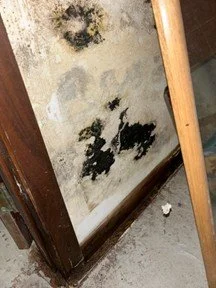
·         Better Air Quality

Cleaning coils improves air circulation and helps prevent mold and mildew growth. This leads to healthier indoor air, which is especially important for people with allergies or respiratory issues.

 How to Keep Your Compressor Coils Clean

Cleaning your air conditioner’s compressor coils isn't complicated, but it needs careful attention.

 ·         Turn Off the System

Before doing any maintenance, ensure your air conditioner is turned off to prevent any risks to your safety.

·         Remove Debris

Clear away leaves, twigs, and other debris around your outdoor unit to prevent additional dirt from reaching the coils.

·         Inspect the Coils

Inspect the coils for dirt and grime. If they appear coated, it’s time to clean them.

·         Use a Coil Cleaner

Buy a coil cleaner made specifically for air conditioners. Follow the manufacturer’s instructions for safe and effective use.

·         Rinse and Dry

After applying the cleaner, rinse the coils thoroughly with water and let them dry completely before restarting the system.

·         Schedule Professional Maintenance

While DIY cleaning can work well, it’s smart to set up regular maintenance with a licensed HVAC professional. They can perform a more detailed inspection, conduct a deeper clean, and spot potential problems before they become significant.

 Summary

Keeping your air conditioner compressor coils clean is a simple yet vital part of system maintenance. Doing so can boost energy efficiency, extend your unit's lifespan, reduce costs, and keep your indoor environment comfortable. You can protect your investment and enjoy consistent cooling during hot summer months with just a little effort. Don’t wait for problems to arise—take action today to ensure your air conditioner runs smoothly and efficiently.

 At HomePro Inspections, our home inspectors are trained to inspect all areas of the home. Any issues found are documented in your home inspection report and recommended for resolution by a qualified professional.

 Visit our website to learn more or to schedule your home inspection in the Rochester, Owatonna, and Faribault, MN areas. You can contact us today at (507) 202-8942, email us, or utilize our online “Schedule Now” feature to set up an appointment.


Maintenance Checklist for Summer

Summer is a time for fun and family. You want to make the most of your time and not spend it working around the house, but there always seem to be other priorities. Attending to your summer home maintenance checklist early will save you time, money, and headaches down the road. Below are a few maintenance items the professional home inspectors at HomePro Inspections want you to consider in order to better protect and properly maintain your home.

 Indoor Maintenance

 ·         Clean, inspect, and reverse the rotation of your ceiling fans.

Dusting your fans regularly will help them better move the air in your home. Inspect your fans for dust buildup, loose blades, vibrations, and wobbling. Wobbling will add additional stress to the motor fan bearings, resulting in increased wear.

Be sure that your fan blades are rotating counterclockwise in the summer, pushing the air towards the floor. This can help reduce the room temperature by up to 8 degrees. In the winter, you want to change the fans to turn in a clockwise rotation.

 ·         Inspect for leaks at your doors and windows.

Reducing energy bills and your impact on the environment should be a goal for every homeowner. Allowing your conditioned indoor air to leak out is bad for your energy efficiency. Inspect the seals and weatherstripping on your doors and windows. If you are a DIYer, replace or repair as needed, or call a window contractor.

 ·         Clean your air ducts and vents.

Perform an inspection of all exhaust fans, ventilation systems, dryer exhaust, and your HVAC air ducts and returns. Over time, dust builds up, restricts flow, and ultimately reduces efficiency and increases energy consumption. Clean ducts and vents help to aid efficient exhaust and improve the circulation of the air in your home.

 ·         Inspect and test your smoke and carbon monoxide detectors.

Regular upkeep and inspection of your smoke and carbon monoxide detectors helps ensure your family’s safety. Replace batteries when needed, and if your smoke detectors are more than 10 years old, they should be replaced.

 Outdoor Maintenance

·         Service your air conditioner.

It’s a good idea to have your air conditioning system serviced annually. There is nothing worse than coming home on a hot and humid day to find your air conditioner has stopped working. Emergency service calls can be expensive, and you may have to wait a day or two to get someone to your home for repairs. Periodic cleaning and care of your condensate line will help prevent overflows into your home. Having your system maintained regularly can save you headaches and money in the long run.

 ·         Inspect your home’s siding and trim.

The seasons can take a toll on your siding and trim. Making any necessary repairs, sealing up cracks and openings, and removing mold and dirt from your siding will increase its life. Using a pressure washer and products specific to cleaning your siding will make this job easier. In addition to curb appeal, keeping your siding maintained will help protect your home from the elements.

 ·         Clean your gutters and downspouts.

This is not a fun job, especially if your home has more than one level. Gutters and downspouts play a key role in directing water away from your home. If you are not comfortable doing this yourself, hire a professional.

 ·         Spruce up your landscaping.

Replace any shrubs or plants that may have been damaged due to the winter or drought. Trim all branches and limbs away from your home so that they do not rub on the shingles or siding. Check branches on trees for damage and trim or remove them if necessary. Bigger projects should be left to professionals if they are close to power lines, fences, or other structures. Proper landscaping can also keep bugs and critters away from your home. If you find any insect infestations in your landscaping, call a professional to resolve the problem.

 Summary

Your home is probably your most important asset. Keeping your home’s systems maintained and properly functioning will manage costs and keep your home looking good.

 At HomePro Inspections, our home inspectors are trained to inspect all areas of the home. Deferred maintenance can turn a relatively simple project into a more serious repair if left unchecked. Any issues found are documented in your home inspection report and recommended for resolution by a qualified professional.

 Visit our website to learn more or to schedule your home inspection in the Rochester, Owatonna, and Faribault, MN areas. You can contact us today at (507) 202-8942, send us an email, or utilize our online “Schedule Now” feature to set up an appointment.

Why Venting the Bathroom Fan into the Attic Space Is a Poor Idea

Building codes across the country require bathroom venting. While most think that a bathroom fan is primarily installed to remove unpleasant odors (which, thankfully, it does!), that fan actually has a far more important role to play. The home inspection professionals at HomePro Inspections offer the following information to help you understand the main reason for a bathroom fan and its vital function to remove moisture from the bathroom and safely vent it out of the house.

  A Bit of Perspective

For many, many years, homes were typically built with just one window in the bathroom. That was usually fine because those older homes were generally not very airtight and usually only contained a bathtub, sink, and toilet. Over time, homeowners renovated and added a shower to the bathroom. Because of its convenience, bath day turned into a daily shower ritual as the family grew. Showers create a lot of humidity, and if everyone in the family showered every day, the bathroom could get extremely steamy. The solution was to install a bathroom fan to help exhaust the excessive moisture out of the bathroom. Unfortunately, some contractors and DIY homeowners took the easy route and vented the bathroom fan directly into the attic space instead of the exterior of the home.

 The outlet of a bathroom fan directed into the attic space

The Downside of Venting the Bathroom Fan into the Attic

Over time, the excessive humidity and moisture vented into the attic can begin to cause structural and health issues. Instead of being vented directly to the exterior of the house, the moisture condenses on interior roofing structures and sheathing. This accumulation of moisture creates a highly conducive environment for mold and mildew to grow and thrive. In many cases, dry rot and mold colonies have been found in the roofing structure and sheathing.

 In the 1990s, as building design and construction practices changed, building codes also began to change. One of these changes is the requirement that a bathroom fan vent directly to the outside of the home. Since that time, as building practices continue to evolve, the requirements for bathroom ventilation have also continued to evolve.

 Modern Attic Design and Purpose

Today’s attics are designed to allow excess heat to escape. Typically, vents are installed at the soffits for air intake and near the peak for exhaust. These can include roof vents, ridge vents, turbines, or thermostatically controlled power vents. When functioning properly, air enters from the lower soffit area, rises through the attic, and exits via the peak vents. 

 Occasionally, in an effort to improve energy efficiency, homeowners add extra insulation to the attic. It’s common in older homes for our home inspectors to find that soffit vents have been covered when insulation was added, which blocks proper airflow through the attic. While air can still move, the restricted airflow doesn’t allow for the efficient removal of excessive moisture. When our home inspectors encounter situations of poor attic ventilation, they usually find issues such as staining, deterioration on the roof sheathing, and rusted nails.

 The photo below shows an exhaust vent that has become disconnected from the roof vent and is venting into the attic space near the soffit. The picture clearly shows the staining, deterioration on the sheathing, and the rust on the nails this problem has caused.

During a home inspection, if the attic space is accessible, our home inspectors check to ensure that a bathroom fan or kitchen exhaust is not venting into the attic. If we find any issues, they are documented as needing correction in our inspection report.

 Conclusion

Venting your bathroom fan directly into the attic space is not recommended. It is acceptable to vent through the attic space from your bathroom fan to a proper roof vent using appropriate venting materials. In the end, when installed correctly, properly venting your bathroom fan will help reduce moisture problems in the bathroom without causing unintended issues in the attic.

 Visit our website to learn more or to schedule your home inspection in the Rochester, Owatonna, and Faribault, MN area. You can contact us today at (507)202-8942, send us an email, or use our online “Schedule Now” feature to set up an appointment.

There’s a Water Leak in My Furnace—What Do I Do Now?

A water leak in a furnace can be a common household problem that arises for various reasons. While it may seem alarming, understanding the root causes of the water leak will help you address the problem effectively. The home inspection professionals at HomePro Inspections aim to assist you in identifying the most common reasons why there’s a water leak in your furnace.

 Corrosion from water leaking at the furnace

 Condensation from a High-Efficiency Furnace

High-efficiency furnaces, also known as condensing furnaces, are designed to extract additional heat from the combustion gases. This process can create condensation, which is usually drained away from the furnace through a pipe or hose. If the drainage system is clogged, damaged, or improperly installed, water may leak around the furnace.

Solution:

- Check for clogs in the condensation drain or hose.

- Inspect the drainpipe for cracks or disconnections.

- Clean the drain line with a solution of water and vinegar, or call a professional HVAC technician if needed.

 Humidifier Issues

Some furnaces come with a built-in humidifier to add moisture to the air in your home. If the humidifier fails, it can cause a water leak. Possible causes include a clogged drain line, a faulty valve, or damaged components inside the humidifier.

Solution:

- Inspect the humidifier for visible leaks or blockages.

- Replace damaged parts or consult a technician for repairs.

 Broken or Clogged Drain Pan

Furnaces typically feature a drain pan to collect water, but over time, it may crack, rust, or become clogged with debris. If the pan cannot effectively hold or drain water, leakage will occur.

Solution:

- Check and clean the drain pan.

- Replace the pan if it is damaged.

 Water is leaking at the base of the furnace.

 Faulty Heat Exchanger

A damaged heat exchanger can cause water leakage, particularly in older furnaces. Although it's less common, this issue demands immediate attention as it may also signal other operational problems.

Solution:

- Contact a professional HVAC technician to inspect and replace the heat exchanger.

 Air Conditioner Drainage Issues

If your furnace shares space or a system with your central air conditioner, the water may be coming from the AC unit. A blocked condensate line or an overflowing AC drain pan might be causing water to pool near the furnace.

Solution:

- Verify whether the water is from the air conditioner.

- Clear any blockages in the AC condensate line or drain pan.

 Improper Installation

Improper installation of the furnace or its components can lead to leakage. Incorrect slope angles, poorly connected pipes, or inadequate seals may fail to direct condensation effectively.

Solution:

- Have a licensed HVAC professional inspect the installation and make necessary adjustments.

 Summary

A water leak in your furnace usually signals a minor issue that can be easily fixed with a simple cleaning or minor repair. However, it is essential to address the problem quickly, as prolonged water damage can negatively impact your furnace and the surrounding areas. If you cannot identify or resolve the issue yourself, it is always wise to consult a qualified HVAC technician.

 At HomePro Inspections, our home inspectors are trained to identify and report any potential issues they may encounter during inspections. Any problems are documented in your home inspection report and recommended for resolution by a qualified professional.

 Visit our website to learn more or to schedule your home inspection in the Rochester, Owatonna, and Faribault, MN areas. You can contact us today at (507) 202-8942, send us an email, or utilize our online “Schedule Now” feature to set up an appointment.


Difference Between Manometer of a Radon Mitigation System and Radon Test Reading

Radon is a naturally occurring radioactive gas that can pose serious health risks when present in high concentrations indoors. To manage and reduce radon levels, homeowners often use radon test kits and radon mitigation systems. While both are essential for ensuring safe radon levels, the home inspection professionals at HomePro Inspections want to help you understand the distinct roles of radon test readings and the manometer in a radon mitigation system.

 One common question we often receive is, “Why is the reading from the radon test different from the reading on the radon mitigation system?” The answer is that it has to do with the fact that they represent two entirely different measurements. Let me explain.

 Radon Test Reading

 Radon test readings measure the actual concentration of radon gas in the air, expressed in picocuries per liter (pCi/L). These readings provide direct insight into whether radon levels are within safe thresholds, typically set by regulatory authorities like the Environmental Protection Agency (EPA) in the United States. The EPA recommends taking action if radon levels exceed 4 pCi/L, although levels below this are still advised to be reduced whenever feasible.

 Electronic Continuous Radon Monitor (CRM)

How Radon Tests Work

Radon tests can be conducted using short-term or long-term methods.

· Short-term tests typically measure radon levels over a span of 2 to 7 days, utilizing activated charcoal kits or electronic continuous radon measurement devices. HomePro Inspections employs CRM devices for real estate transactions.

· Long-term tests offer a more accurate average of radon levels over a period of 90 days to a year, providing a better understanding of seasonal variations.

 Purpose of Radon Test Readings

Radon test readings are used primarily to:

· Identify if mitigation efforts are necessary.

· Monitor radon levels over time to ensure ongoing safety.

· Verify the effectiveness of an existing radon mitigation system.


Radon test readings plotted over time

 Passive versus Active Mitigation System

There are two types of radon mitigation systems: passive and active. A passive system consists of a vertical vent pipe that runs from a sub-slab collection point, through the conditioned space of the home, and out through the roof. There is no fan in the system; it relies on the natural "stack effect" to draw soil gases up and out of the house.

 An active mitigation system, while employing the same components as a passive mitigation system, utilizes a radon vent fan to “actively” pull air from beneath the structure. Generally, if a passive system cannot safely mitigate indoor radon levels, a radon vent fan can be added to convert it to an active system.

 Manometer on a Radon Mitigation System

A manometer, usually seen as a U-shaped or digital gauge, is a vital part of an active radon mitigation system. Unlike radon test readings, the manometer does not measure radon concentration. Instead, it monitors the pressure differential created by the system's fan to ensure it operates properly.

 A manometer on an active radon mitigation system

 How a Manometer Works

The manometer measures the suction or pressure generated by the mitigation fan, typically in inches of the water column. This pressure is essential for drawing radon gas from beneath a building's foundation and safely venting it above ground. A properly functioning mitigation system will show consistent readings on the manometer, indicating that the fan is working.

 Purpose of the Manometer

The manometer serves the following purposes:

· Confirms that the radon mitigation system is active and generating suction.

· Alerts homeowners to potential issues, such as fan failure or blockages in the vent system.

· Provides a visual reference for maintaining system performance.

 Key Differences Between Radon Test Readings and the Manometer

· Measurement Focus—Radon test readings measure radon levels in the air, while the manometer measures pressure differences within the mitigation system.

· Function—Radon test readings assess the presence of radon, whereas the manometer monitors the operational status of the mitigation system.

· Usage—Radon test readings are conducted periodically to evaluate safety, while the manometer provides continuous monitoring of system functionality.

 Summary

Both the radon test readings and the manometer play critical roles in managing indoor radon levels, yet they have distinct functions. Radon test readings ensure that radon concentrations remain within safe limits, while the manometer serves as a system health indicator, confirming that the mitigation system effectively reduces radon gas. Understanding these differences empowers homeowners to maintain a safe and healthy living environment while confidently addressing radon concerns.

  At HomePro Inspections, our home inspectors are trained to identify and report any potential issues they may encounter. Any problems are documented in your home inspection report and recommended for resolution by a qualified professional.

 Visit our website to learn more or to schedule your home inspection in the Rochester, Owatonna, and Faribault, MN areas. You can contact us today at (507) 202-8942, send us an email, or utilize our online “Schedule Now” feature to set up an appointment.


How to Clean Refrigerator Condenser Coils in 5 Easy Steps

Since your refrigerator is one of the most costly and hard-working appliances in your kitchen, you naturally want it to operate as long and efficiently as possible. Ensuring that the condenser coils are kept clean is the simplest way to accomplish these objectives. The following five simple steps, which only take ten to fifteen minutes to accomplish, are provided by the home inspection experts at HomePro Inspections to assist with this essential cleaning requirement.

 Dirty refrigerator condenser coils at the base of a refrigerator.

 What Are Refrigerator Condenser Coils, and What Do They Do?

Condenser coils are an essential component of the refrigerator's cooling mechanism, which disperses heat from the interior of the appliance back into the surrounding air. Typically located on the rear or underneath a refrigerator, the condenser coils are exposed to aid with airflow and heat dissipation.

 Why Do Refrigerator Coils Require Cleaning?

Dust, debris, and pet hair can clog the refrigerator’s condenser coils over time, hindering its ability to disperse heat easily and uniformly. When this happens, your refrigerator must work harder to stay cool, which increases its electricity use and shortens its lifespan.

 Dirty refrigerator condenser coils on the back of a refrigerator.

 The good news is that cleaning the condenser coils on your refrigerator is a reasonably easy do-it-yourself task. Cleaning the condenser coils should be done at least once a year, and ideally every six months if you have furry pets.

 Tools required:

· Flashlight

· Dust mask

· Condenser coil brush

· Vacuum cleaner

 5 Easy Steps:

 1.    Unplug the power cord from the electrical outlet. Depending on the location of the outlet, you may need to pull your refrigerator away from the wall. Keep the refrigerator doors closed to help maintain the cold temperature of their contents.

2.    Locate the condenser coils, which are typically found on the back or underneath your refrigerator. If they are underneath, you will need to remove the toe grill.

3.    Wear your dust mask to avoid inhaling any airborne dust you might stir up. Using your flashlight, check the condenser coils. Vacuum as much as possible with a narrow vacuum attachment.

4.    Using the condenser coil brush, work through the coils to loosen debris and dust. Keep the vacuum attachment close to the brush to reduce dust. The brush should reach most of the coils. These brushes are usually flexible, and you might need to bend the tip to access difficult areas.

5.    Take a minute to check your work and vacuum up any lingering dust, debris, or runaway dust bunnies. Wipe down the toe grill and snap it back into place. Plug your refrigerator back into the wall outlet and roll it back into position.

 Dirty toe grill at the front of the refrigerator

Conclusion

Keeping your refrigerator running at peak performance is as easy as doing a 15-minute cleaning once or twice a year. When you're finished, treat yourself to a cold beverage for a job well done. Your refrigerator will consume less energy and last longer, which, when you think about it, is really pretty cool, right? (See how I did that?)

 At HomePro Inspections, our home inspectors are trained to identify and report any potential issues they may encounter. Any problems are documented in your home inspection report and recommended for resolution by a qualified professional.

 Visit our website to learn more or to schedule your home inspection in the Rochester, Owatonna, and Faribault, MN areas. You can contact us today at (507) 202-8942, send us an email, or utilize our online “Schedule Now” feature to set up an appointment.


Drywall or Plaster – What Is the Difference? (Copy)

When evaluating a home, understanding the materials used for its interior walls is crucial. For the professional home inspectors at HomePro Inspections, knowing the difference between drywall and plaster provides insights into the home's history, condition, and potential maintenance needs. Although both materials serve a similar purpose—creating smooth and durable walls—their characteristics, installation methods, and effects on homes can differ significantly.

 Cracked and delaminating plaster wall

 What is plaster?

Plaster is an ancient building material that has been used for centuries. Traditionally applied over wooden lath or metal mesh, plaster creates a hard, durable surface that can last for decades. Homes built before the 1950s often feature plaster walls, which add character and charm but may require more maintenance than drywall.

 The benefits of plaster:

· Durability—Plaster is renowned for its strength, longevity, and ability to endure wear and

tear over time.

· Textured Finish—Unlike drywall, plaster can be molded into intricate designs or patterns,

adding aesthetic appeal to older homes.

· Sound Insulation—The density of plaster offers superior soundproofing compared to drywall.

· Historical Value—Plaster walls are often found in historic properties, serving as a

testament to the traditional craftsmanship of the past.

 Checking plaster during home inspections is essential.

Inspecting plaster walls requires careful attention to details such as cracks, crumbling, and detachment from the lath. These issues can indicate structural problems or age-related wear. Home inspectors may also check for signs of moisture damage, as plaster is susceptible to deterioration when exposed to water over time. Repairing plaster often involves reapplication or reinforcement, which can be more labor-intensive than drywall repairs.

 What is drywall?

Drywall, also known as gypsum board or sheetrock, is a commonly used material in modern construction. It features a gypsum core sandwiched between two layers of heavy paper. Lightweight, easy to install, and cost-effective, drywall has become the standard for wall construction in most homes built after the mid-20th century.

 Cutting a sheet of drywall using a straight edge and a blade

 Drywall has many beneficial and economical features:

· Ease of Installation—Drywall is available in large sheets, typically measuring 4 feet by 8 feet

or larger, which can be cut to size and mounted to wall studs using screws or nails.

· Quick Repairs—Damaged drywall can be easily patched, making it a favorite among DIY

enthusiasts.

· Uniform Surface—After installation, drywall offers a smooth finish that is perfect for

painting or wallpapering.

· Fire Resistance—Gypsum possesses natural fire-resistant properties, providing an

additional layer of safety.

 Checking drywall during home inspections.

During a home inspection, drywall is typically assessed for its condition and any visible signs of damage, such as cracks, holes, nail pops, or water stains. Home inspectors may also verify proper installation techniques. Additionally, the presence of mold or mildew on drywall can indicate underlying moisture issues that require attention.

 The key differences between drywall and plaster.

While both materials serve as wall coverings, their differences can influence a homeowner’s decision during renovations or a home inspector’s evaluation.

· Installation—Drywall is installed in sheets and secured directly to the studs, making the

process faster and less labor-intensive. Plaster, on the other hand, is applied in multiple layers over a lath framework, requiring skilled craftsmanship and more time.

· Cost—Drywall is generally more affordable in terms of both material and labor costs.

Plaster, because of its intricate application process, tends to be costlier.

· Appearance—Drywall provides a smooth, uniform surface ideal for modern aesthetics,

while plaster can offer unique textures and historical charm.

· Longevity—Plaster walls are more durable but can be harder to repair. Drywall, although

less robust, is easier to patch or replace.

 Why understanding this difference matters in a home inspection.

For home inspectors, distinguishing between drywall and plaster involves more than just identifying materials; it entails assessing the condition and functionality of the walls. Plaster may indicate issues such as age-related wear or water damage, while drywall can reflect problems linked to improper installation or rapid deterioration from moisture.

 Summary

Whether you’re a homeowner contemplating renovations or a home inspector assessing a property, understanding the difference between drywall and plaster is crucial. Each material presents unique advantages and challenges, reflecting the evolution of construction practices over time. By recognizing their distinct characteristics, you can make informed decisions that enhance the quality and functionality of any home.

 At HomePro Inspections, our home inspectors are skilled in evaluating the condition of a home’s interior surfaces and identifying any defects. Any issues found are documented in your home inspection report and recommended for resolution by a qualified professional.

 Visit our website to learn more or schedule your home inspection in the Rochester, Owatonna, and Faribault, MN areas. You can also contact us today at (507) 202-8942, via email, or use our online “Schedule Now” feature to set up an appointment.


Venting Your Bathroom Fan to The Attic Space is a Bad Idea

Building codes across the country mandate bathroom venting. While these codes may seem logical to some and confusing to others, they exist for reasons greater than simply venting the air after your notoriously fragrant Uncle Larry has just visited the bathroom, resulting in some major aromatic issues. The primary purpose of the bathroom fan is to safely and efficiently remove moisture from the room. The home inspection professionals at HomePro Inspections offer the following information and advice to help you understand the importance and necessity of proper bathroom venting.

Bathroom Design Has Evolved

Years ago, homes typically had just one bathroom window, which was sufficient to promote proper airflow when the seasons permitted. Older homes were generally not built as tight and typically only included a bathtub, a sink, and a toilet. Over time, people renovated and added the convenience of a shower to the bathroom, and “bath day” turned into a daily shower ritual as the family grew. Showers create a lot of humidity, and if everyone in the family takes a shower every day, the bathroom can become quite a moist, steamy place. The solution was to install a bathroom fan to exhaust the moisture-rich air, but often, contractors and DIY homeowners would simply vent the fan exhaust directly into the attic.

Why It’s Bad to Vent Humid Bathroom Air Directly into the Attic

Over time, the high levels of humidity vented directly to the attic began to cause problems. It didn’t find its way up and out through the roof vent; instead, it condensed on the roofing structure and sheathing. That moisture created an environment conducive to mold, mildew, and, in some cases, dry rot of the roofing structure. At some point in the 1990s, building codes changed, and bathroom fans were required to vent to the exterior of the home. The requirements for bathroom venting have continued to evolve.

 The following photo shows moisture damage from an exhaust fan venting into the attic space near the soffit. Note the staining and deterioration on the sheathing and rafters.

During the course of a home inspection, if the attic space is accessible, our home inspectors check to ensure that any bathroom fans or kitchen exhaust are not venting into the attic space. If we find any issues, they are documented as needing correction in our inspection report.

 Attic Design and Purpose

Attics are designed to allow excess heat to escape. Typically, there are vents at the soffits for air to enter, as well as vents near the peak for air to exhaust. These can include roof vents, ridge vents, turbines, or thermostatically controlled power vents. If everything is functioning as it should, air will enter from the lower soffit area and move up and out of the vents at the peak. 

 Occasionally, homeowners add extra insulation to the attic space to enhance energy efficiency. It is common for our home inspectors to find that the soffit vents in older homes have been covered with insulation. This restricts airflow through the attic. We often observe signs of poor ventilation, such as staining or deterioration on the roof sheathing, as well as rusted nails. Although air can still move through the attic space, it is insufficient to eliminate excess moisture.

 Conclusion

While venting a bathroom fan so it exhausts directly into the attic space is no longer acceptable, it is acceptable to use proper venting material to vent a fan through the attic space to reach a suitable exterior wall or roof vent. Ultimately, if done correctly, you can reduce moisture problems in the bathroom and avoid health issues caused by mold and mildew and structural deterioration, such as dry rot in the attic space.

 At HomePro Inspections, our home inspectors are skilled at evaluating the condition of the garage floor and identifying any defects. Any issues found are documented in your home inspection report and recommended for resolution by a qualified professional.

 Visit our website to learn more or to schedule your home inspection in the Rochester, Owatonna, and Faribault, MN areas. You can also contact us today at (507) 202-8942, by email, or use our online “Schedule Now” feature to schedule an appointment.


Concrete Garage Floor Cracks: Causes and Prevention

When I’m performing home inspections and asked by clients about concrete garage floor cracks, one of my favorite replies is, “Here in Minnesota, there are two kinds of concrete: the kind that’s cracked and the kind that is going to crack!”

Common type of crack in a concrete garage floor

A concrete garage floor is a vital part of a home's infrastructure, offering a sturdy surface for parking vehicles, storing equipment, and enabling various activities. However, despite its strength and durability, concrete can develop cracks over time. The professional home inspectors at HomePro Inspections provide valuable information to help you understand the reasons behind these cracks and how to prevent them, which is crucial for maintaining a safe and functional garage space.

 Common Causes of Concrete Garage Floor Cracks

 Shrinkage

As concrete cures, it loses moisture and contracts, which creates internal stress that can lead to cracks. Proper curing techniques, such as maintaining adequate moisture levels, can help mitigate cracking due to shrinkage.

 Temperature Changes

Concrete responds to temperature fluctuations by expanding and contracting. These movements can cause cracks, particularly with rapid temperature changes. Utilizing expansion joints in the garage floor can accommodate these movements and lessen the likelihood of cracking.

 Settlement

Settlement cracks occur when the ground beneath the concrete shifts or settles unevenly. Ensuring that the garage floor is built on a stable and well-compacted base can prevent cracking related to settlement.

 Overloading

Excessive weight from heavy vehicles, machinery, or stored items can exert pressure beyond the floor's capacity, leading to cracks. Distributing weight evenly and avoiding overloading the garage floor can help prevent this type of damage.

 Improper Installation

Poor installation practices, such as incorrect mixing, inadequate reinforcement, or insufficient curing time, can lead to a weak concrete structure that is prone to cracking. Hiring experienced professionals and following best installation practices can ensure a robust and durable garage floor.

 Preventive Measures for Concrete Garage Floor Cracks

 Proper Curing

Implementing proper curing techniques, such as maintaining moisture levels and using curing compounds, can significantly reduce the risk of shrinkage cracks. Allowing the concrete to cure gradually ensures a stable and crack-resistant floor.

 Use of Reinforcement

Incorporating reinforcement materials such as steel rebar or wire mesh into the concrete mix increases its strength and flexibility, decreasing the chances of cracking.

 Expansion Joints

Installing expansion joints at regular intervals enables the concrete to expand and contract without causing cracks. These joints serve as buffers, accommodating temperature-induced movements and preventing stress buildup.

 Stable Base Preparation

Preparing a stable and well-compacted base before pouring concrete is crucial for preventing settlement cracks. Ensuring that the ground is properly graded and compacted establishes a solid foundation for the garage floor.

 Monitor Load Limits

Being aware of the weight limits of your garage floor can help prevent cracks related to overloading. Distribute heavy loads evenly and avoid placing overly heavy items on the floor.

 Addressing Existing Cracks

 Fillers and Sealants:

For minor cracks, using fillers or sealants repairs and prevents further damage effectively. These materials fill the cracks and create a smooth surface, stopping moisture and debris from entering. When asked how to properly repair cracking in a concrete garage floor, our home inspectors typically recommend that the client photograph the issue and take it to one of the big-box home improvement stores. A variety of products are available, and they will be able to recommend the right product.

 Professional Repairs

Consulting a professional concrete contractor is recommended for larger or more severe cracks. Experts can evaluate the extent of the damage and suggest appropriate repair solutions, such as epoxy injections or concrete resurfacing.

Sealing more minor cracks in a concrete garage floor

Conclusion

Concrete garage floor cracks are a common issue faced by homeowners. However, understanding their causes and implementing preventive measures can significantly reduce their occurrence. You can maintain a durable and crack-resistant garage floor by ensuring proper installation, curing, reinforcement, and load management. Regular inspections and prompt repairs will further enhance the longevity and functionality of this essential part of your home. Keep your garage floor in top condition by following these guidelines and addressing any issues as they arise.

 At HomePro Inspections, our home inspectors are skilled at evaluating the condition of the garage floor and identifying any defects. Any issues found are documented in your home inspection report and recommended for resolution by a qualified professional.

 Visit our website to learn more or to schedule your home inspection in the Rochester, Owatonna, and Faribault, MN areas. You can also contact us today at (507) 202-8942, by email, or use our online “Schedule Now” feature to schedule an appointment.


Spring Cleaning and Maintenance of Your Home’s Gutters and Downspouts

Winter is finally fading (I think), and spring blossoms are beginning to emerge. With warmer weather on the way, it's essential to prepare your home for the new season. One of the most critical tasks often overlooked is cleaning and maintaining gutters and downspouts.

 Gutters filled with leaves

These components protect your home from water damage by directing rainwater away from the roof, walls, and foundation. Proper upkeep ensures their efficiency and longevity, helping to prevent costly repairs. The professional home inspectors at HomePro Inspections provide the following valuable information to help you understand what to look for regarding proper drainage and preventing potential damage to your home.

 The Importance of Gutters and Downspouts

Gutters and downspouts are essential components of a home's drainage system. They work together to channel rainwater away from the house, preventing water from seeping into the foundation, causing erosion, or damaging the siding and roof. In the inspection report, your home inspector will document any issues related to your gutters and downspouts. Without proper maintenance, clogged or damaged gutters can lead to various problems, including

 ·         Water damage to the roof and fascia boards

·         Basement flooding

·         Foundation erosion

·         Damage to landscaping

·         Mold and mildew growth

 Preparing for Cleaning

 Before you begin cleaning your gutters and downspouts, gather all necessary supplies and ensure your safety.

 ·         Ladder: Utilize a durable, extendable ladder to reach the gutters safely.

·         Work gloves: Safeguard your hands against debris and sharp edges.

·         Bucket: Gather debris and leaves while you clean.

·         Gutter scoop or trowel: Remove debris effectively.

·         Garden hose: Remove leftover dirt and verify proper water flow.

·         Safety goggles: Protect your eyes from debris and dirt.

 As always, safety comes first. If you are uncomfortable working on a ladder or if your gutters are excessively high, you should consider hiring a contractor or handyman to help clean your gutters and downspouts.

 Step-by-Step Cleaning Process

 Remove debris.

Begin by removing large debris such as leaves, twigs, and dirt from the gutters. A gutter scoop or trowel can help make this task easier. Gather the debris in a bucket for disposal. Clean from the downspout end and move towards the opposite end.

 Flush the gutters.

After clearing the debris, use a garden hose to thoroughly flush the gutters. This helps eliminate any remaining dirt and allows you to check for proper water flow. Ensure that water flows freely through the downspouts. If you notice any clogs, use the hose to dislodge them or a plumber's snake for more stubborn blockages.

 Check for damage.

While cleaning, inspect the gutters and downspouts for any signs of damage, including cracks, holes, or rust. Pay particular attention to the joints and seams. If you notice any issues, repair them promptly to prevent water leakage.

 Ensure proper alignment.

Ensure that the gutters are properly aligned and securely fastened to the roof. Improper alignment can cause water overflow and hinder effective drainage. Adjust any loose brackets or fasteners as needed.

 Install gutter guards.

Consider installing gutter guards to reduce the frequency of cleaning. These guards prevent debris from entering the gutters while allowing water to flow through. They are available in various materials, including mesh, foam, and brush.

 Removing leaves from a downspout

 Downspout Maintenance

 Clear blockages.

Check the downspouts for blockages by running water through them. If the water does not flow freely, use a plumber's snake or a high-pressure hose attachment to clear the obstruction.

 Inspect for leaks.

Inspect the downspouts for leaks or cracks. Repair any damage using waterproof sealant, or replace the downspout if necessary.

 Extend downspouts.

Ensure that the downspouts direct water away from the foundation. Use downspout extenders if necessary to channel water further from the house. Proper extensions can prevent water from pooling near the foundation and causing erosion.

 Regular Maintenance Tips

 Perform regular inspections.

Inspect your gutters and downspouts at least twice annually, preferably in spring and fall.

 Clean after heavy storms.

After significant weather events, clear the gutters to eliminate debris that may have gathered.

 Trim nearby trees.

Prevent leaves and branches from clogging the gutters by trimming back trees near the house.

 Install splash blocks.

Position splash blocks at the end of downspouts to safeguard landscaping and channel water away from the foundation.

 Monitor for leaks.

Regularly check for signs of leaks and repair them promptly.

 SUMMARY

Spring cleaning your home's gutters and downspouts is essential for maintaining the integrity and longevity of your property. By following the steps outlined in this guide, you can ensure that your drainage system operates efficiently, preventing water damage and costly repairs. Regular maintenance, along with timely repairs and preventive measures like gutter guards, will help keep your home protected from the elements year-round. Embrace the spring season with confidence, knowing your gutters and downspouts are in outstanding condition.

 At HomePro Inspections, our certified home inspectors are skilled at evaluating the functionality of your gutters and downspouts and identifying any defects. Any issues found are documented in your home inspection report and recommended for resolution by a qualified professional.

 Visit our website to learn more or to schedule your home inspection in the Rochester, Owatonna, and Faribault, MN areas. You can also contact us today at (507) 202-8942, by email, or use our online “Schedule Now” feature to set up an appointment.